Focusing in the Dark: How to Focus on Stars for Milky Way Photography
Focusing in the Dark:
Stars, Not Guesswork
Blurry stars are one of the most common and most avoidable problems in astrophotography. The fix isn't a gadget or a trick — it's a method. Here's exactly how I do it, every single shoot, including footage from a real course session showing it live.
 Out of focus
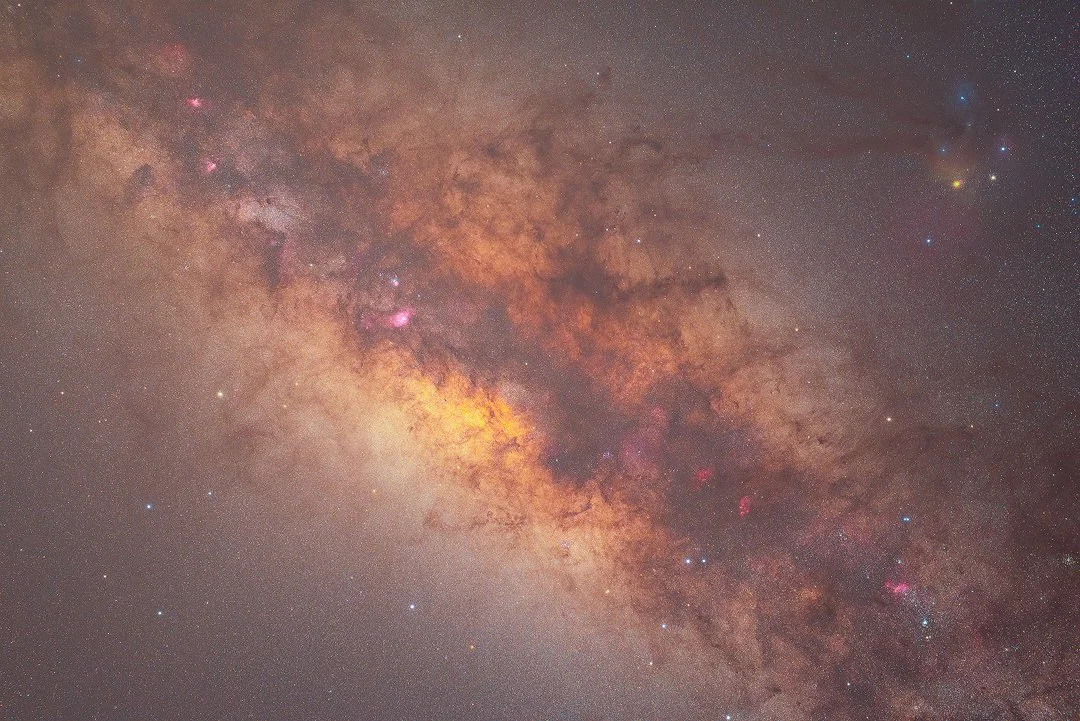 Correctly focused
You've driven an hour out of town, set up in the dark, waited for your eyes to adjust, and finally taken the shot. You get home, open Lightroom, zoom in. The stars are blobs. Soft, smeared, useless. It's one of the most deflating moments in landscape astrophotography, and it happens to almost everyone at some point.
The good news: it's entirely preventable. Focusing on stars in complete darkness isn't difficult once you understand what you're actually doing and why. The method I use takes about 60 seconds, works on virtually any modern mirrorless or DSLR with Live View magnification, and is the most reliable approach I've found. No special gear required.
This month I'm breaking it all down, including a video from one of my courses showing the Live View method live, exactly as I teach it in the field.
Why autofocus fails at night
Autofocus needs enough usable detail in the scene to lock reliably. Whether your camera uses phase-detect, contrast-detect, or a hybrid of both, the result on a dark sky is the same. Tiny stars against near-black don't give the system enough to work with. Many cameras will hunt endlessly without locking, or worse, confirm focus on something they shouldn't.
By the time you realise the shot is soft, the shooting window is gone.
The solution is full manual control. And the tool that makes manual focus accurate at night is your camera's Live View, combined with digital magnification.
The Live View method, step by step
This is the only method I use and the only one I teach. Watch it in action first, then read through the steps below.
-
01Switch to Manual Focus
Switch the lens — or camera body, depending on your system — to MF before you do anything else. Autofocus must be fully disengaged. If it hunts mid-exposure you'll ruin the shot and potentially lose your focus position entirely.
-
02Open Live View and find a bright star
Activate Live View and use the D-pad or touchscreen to move the magnification box onto a bright star. Aim for near the centre of the frame rather than the edge, where lens aberrations can skew your read.
-
03Magnify to maximum
Use the magnification button to zoom into Live View as far as it goes — typically 10x or 16x depending on your body. At this zoom you can see exactly what the star looks like: a large blurry disc when out of focus, a small tight point when you're sharp.
-
04Turn the focus ring slowly — past focus, then back
Rotate the focus ring toward infinity. Watch the star on screen: it will go from a large blob, shrink to a small point, then start growing again as you pass through focus. Go deliberately past the sharpest point in both directions. This is how you confirm you've actually found the minimum rather than just guessed at it.
-
05Lock focus — and don't touch the lens again
Once you've found the smallest, most defined point, stop. Close Live View. Take the shot. The focus ring is now off-limits until conditions change. Even a slight bump can shift focus enough to matter on a high-resolution sensor.
"Don't chase a mathematically perfect point on the LCD. What you're looking for is the smallest, cleanest star image your lens and conditions can render. That's your focus point."
Magnify Live View to maximum, find a bright star, turn the focus ring until the star is as small as possible, lock it, and leave the lens alone.
Focusing for the Milky Way: what actually works
You'll hear a lot of people say "just focus to infinity" for astrophotography. It's not wrong as a starting point, but it's not the whole story. On most modern autofocus lenses, the infinity mark on the barrel is not the same as true optical infinity. It's a rough guide at best, and it shifts with temperature.
The stars are the subject. They are millions of light-years away. Your foreground is not. In a single exposure, you cannot have both tack-sharp stars and a tack-sharp dark foreground. It's physically not possible when shooting wide open at f/2.8. If you try to split the difference, you end up with soft stars and a barely-visible foreground. That's a lose-lose. Focus for the stars. Always.
If you want a sharp foreground alongside sharp stars, the correct approach is to shoot two separate frames: one focused on the stars, one focused on the foreground, and blend them in Photoshop. That's focus stacking, and it's the only way to get both genuinely sharp in a single final image.
How to find focus in the dark
The Live View magnification method above is the most reliable way to nail focus on location. There are also a few practical approaches worth knowing depending on your situation:
The goal in every case is the same: get your focus in the ballpark first, then fine-tune using Live View magnification on the brightest point you can find. Don't start from scratch in complete darkness if you don't have to.
Cold weather focus shift: how to catch it
This catches photographers off guard, especially in alpine or winter environments, but it's worth knowing about even on a cool Queensland night. Large temperature drops during a session can cause a gradual shift in the focal plane, moving you off the sharp point you set earlier. It happens because the different materials inside a lens (glass, metal, plastics) expand and contract at different rates as temperature changes.
The amount of shift varies by lens design and how severe the temperature drop is, but it's a real, documented optical phenomenon worth managing on any long cold session.
How to manage it
Re-check focus every 30–45 minutes during a long cold session, or any time the temperature drops sharply. Open Live View, magnify onto the same bright star, confirm the point hasn't moved. If it has, dial it back in. Note which direction you're adjusting. It tells you which way your specific lens drifts as it cools, which is useful for every future cold session.
Common mistakes that ruin the shot
Beyond getting the initial focus wrong, there are a handful of habits that consistently produce soft stars even when photographers think they've nailed it. These come up in every workshop I run.
Touching the lens after locking focus
The most common one. You lock focus, close Live View, and then attach a filter, adjust the lens hood, or move the camera and in doing so catch the focus ring. On modern lenses with fine-thread electronic rings, even a small rotation shifts focus noticeably. Once it's locked, the ring is off-limits.
Back-button focus left active
If you shoot with back-button focus during the day and forget to check your AF settings at night, you risk accidentally triggering autofocus mid-session and immediately destroying your carefully set manual focus position. Check your AF setup before the session starts, not after something goes wrong.
Trusting the infinity mark on the lens
On most modern lenses the infinity mark on the focus scale is not a reliable indicator of true optical infinity. The actual sharp focus point at infinity often sits slightly before or after the mark, depending on the lens and temperature. Never set focus by the mark alone. Always verify with Live View magnification.
Focusing on a dim star
When choosing which star to focus on, pick a bright one. A bright star or visible planet works well. Dim stars at maximum Live View magnification can be hard to resolve clearly enough to judge sharpness accurately. A bright star gives you a clean, workable image to work with.
Lock focus, don't touch the lens, check your AF settings, ignore the infinity mark, pick a bright star. Do those five things and you've eliminated the vast majority of avoidable focus failures in the field.
Learn this in the field,
not just on a screen.
Workshops with astrophotography content include field teaching on this exact method: planning, focusing, and night setup on location, when conditions and access allow. A few spots remaining across the 2026 calendar.
Weather Decides to Test You — Sapphire Coast Workshop Recap
When the weather decides to test you
Four days. Four photographers. Three nights on the Sapphire Coast. The forecast was bleak from the start — flat skies, thick cloud, no golden hour in sight. But that's not the story. What happened next is why I'll run this workshop every year.
The Sapphire Coast workshop runs once a year, deliberately. It's built around autumn light on the NSW south coast — a window when the angle of the sun is lower, the water is still warm enough for rock platform access, and the crowds that fill Narooma and Bermagui in summer have mostly gone. What it can't be built around is the weather. Nobody gets to choose that.
This year, the weather chose for us. Three days of thick overcast, no directional light, no dawn colour, no evening glow. The kind of forecast that would make a lot of photographers question whether they'd booked the right trip. But here's the thing — a workshop that only works in good conditions isn't actually a workshop. It's a guided shoot with favourable odds. What we ran across four days was something more useful than that.
This recap covers the four main lessons from the week — what we shot, what we learned, and what the final morning at Horsehead Rock reminded us all about why we do this.
Flat light forces better composition
The first two days arrived with exactly what the forecast promised: a thick, featureless overcast that flattened everything. No shadows. No directional light. No drama handed to us on a plate.
This is the moment most photographers pack away the camera and wait for better conditions. We didn't. Instead we used it as a lesson in what actually carries an image when light refuses to do the heavy lifting: composition.
When you can't rely on golden hour to bail you out, every decision becomes intentional. Where you stand. What you exclude from the frame. How you layer foreground, mid-ground, and background. Without the distraction of beautiful light, you're forced to think about structure — and that's a skill that transfers across every condition you'll ever shoot in.
"Flat light doesn't ruin the shot. It reveals whether the composition was strong enough to begin with."
We worked the coastline deliberately, looking for leading lines in the rock formations, using the receding tide to create depth, and spending time on compositions before ever lifting the camera to our eye. The resulting images weren't the ones anyone expected to take. They were better in a different way.
Shoot in bad light on purpose — at least once. You'll return to good light as a fundamentally stronger photographer. The conditions don't determine the image. Your decisions do.
Monochrome and B&W: two different tools
Overcast coastal light has one gift that photographers consistently miss: it's extraordinarily well-suited to black and white and monochrome processing. The absence of competing colour means you're working purely with tone, texture, and shape — and the soft, even illumination from cloud cover renders detail beautifully.
In the editing session we looked at both approaches side by side. They're not the same thing, and it's worth understanding the difference.
Monochrome is about retaining luminosity and tonal range — a precise, clean conversion that maps colour information into tone. It tends to feel more measured and graphic. Black and white, processed with contrast and midtone manipulation, pushes toward mood. Crushed blacks. Lifted highlights. The drama that the weather refused to give us in the field.
I edited two shots from the weekend to demonstrate this. Both valid. Both made from images that most photographers would have never taken in those conditions.
How to choose between them
The decision isn't aesthetic preference — it's dictated by the image. If the scene has clean structural geometry, strong tonal separation, and reads clearly without heavy contrast manipulation, monochrome conversion is usually cleaner and more credible. If the scene needs drama to work — if the light was flat and you need the processing to carry emotional weight — a full black and white treatment with lifted highlights and crushed shadows can rescue a frame that colour processing can't.
Pull the same RAW file into both treatments before committing. Give it 60 seconds. You'll usually know immediately which one is doing more work for the image.
Next time you shoot in flat or overcast conditions, don't fight the light — work with it. Pull the RAW into Lightroom and try both approaches before you decide the session was a write-off.
Ethical Milky Way blending: how it actually works
Ethical Milky Way blending is one of those topics that gets misunderstood — and the misunderstanding usually comes from confusing two very different situations where blending is the right call.
Situation one: you can't go back
Sometimes you visit a location once and you capture the foreground perfectly — but the Milky Way isn't in position, the sky isn't dark enough, or the conditions simply don't cooperate. If you've used PhotoPills to model the exact alignment beforehand, you know that the composition is achievable. Blending a sky captured later at that same location, with matching lens and focal length, isn't fabricating a scene. It's documenting a scene that's physically real — just not on one night.
Situation two: star trackers
This is the one most astrophotographers don't talk about openly. When I shoot with a star tracker, the device counteracts the rotation of the earth to keep stars sharp. The consequence is that the foreground becomes blurred during the exposure. A sharp sky and a sharp foreground from a single tracked exposure is physically impossible. Blending isn't a creative shortcut here — it's technically required to produce an accurate result.
On this workshop the conditions didn't allow for a full night session, so on the last morning I ran a focused walkthrough using Milky Way data I'd captured previously in matching Bortle skies. We worked through the full process: planning the alignment in PhotoPills, masking in Photoshop, matching tones and colour temperature, and the complete Milky Way editing workflow from raw processing through to the final composite.

"The ethics aren't about whether you blended. They're about whether the result represents something physically possible — and whether you're honest about your process."
Plan before you shoot. If you're serious about astrophotography, PhotoPills isn't optional — it's how you know whether the shot you want is achievable at all. The blend is the last 10%. The other 90% is showing up prepared.
The last morning: why light changes everything
The final morning of the Sapphire Coast workshop is one I won't forget quickly. After three days of flat overcast sky, the cloud broke at Horsehead Rock during the pre-dawn session — and what arrived wasn't just good light. It was the kind of light that makes every early alarm, every cold drive, every session you pushed through in ordinary conditions feel completely worth it.
Colour swept across the sky, deep pinks and warm ambers stacking above the horizon as side light raked across the rock formations. And that's the thing about side light that you genuinely cannot replicate in post-processing: the three-dimensional quality it creates. Shadows fall at angles that carve depth into surfaces. Textures that are invisible under flat light suddenly become the entire subject. The scene stops being flat and starts feeling like you can reach into the frame.
We'd spent three days building the toolkit — composition, tonal conversion, technical night work. The last morning was where all of it arrived together. The participants who had been frustrated by the weather on day one were now standing in front of conditions that rewarded every decision they'd made across the weekend.

The other side of Horsehead
What most photographers don't realise is that Horsehead Rock has two completely different shooting environments within minutes of each other. The arch is the iconic image — and it earns that status. But the beach on the other side of the headland is rarely photographed, and on the right morning it produces something entirely different: a wide pebble platform, clean leading lines through the wash, and the golden backlight flooding through gaps in the rock stack as the sun lifts behind it.
This is where conditions and preparation converge. We'd scouted the position the previous morning in flat light. On the final morning, with the sky finally doing something worth pointing a camera at, we already knew exactly where to stand.

"Three days of flat light teaches you to make strong images. One morning of the right conditions teaches you why you do this at all."
This is the reason I talk about light as a differentiator — not as a cliche, but as a practical truth. The image from that final morning isn't technically superior to the others. But the light makes it feel like a different world. That's not something you can manufacture. You have to be there, prepared, when it decides to show up.
Keep showing up in ordinary conditions. The photographers who get the extraordinary shots aren't luckier — they've just built the habit of being there so that when the light finally arrives, they're ready for it.
The 2027 Sapphire Coast Workshop
The Sapphire Coast workshop will run again in April 2027. Same format — four days, small group, conditions-led approach across Narooma and Bermagui. New moon timing selected for the best possible astro window. Horsehead Rock at first light, whatever the weather brings.
Dates, pricing, and the full itinerary are on the workshop page. Priority registration is open now.
Join me on the Sapphire Coast in 2027
Small group. Serious instruction. And if we're lucky, one of those last-morning moments that makes everything else worth it.
Best Photography Locations on the Gold Coast
Best Photography Locations on the Gold Coast
From Bortle 2 dark skies at Mount Barney to rainforest waterfalls in Lamington, hexagonal basalt at Fingal Head, and tide-led seascapes at Currumbin Rock — a complete photographer's guide to one of Australia's most diverse regions.
The Gold Coast hinterland and coastline is one of the most diverse photography regions in southeast Queensland — and one of the most underrated. Most photographers think of the Gold Coast as high-rises, theme parks, and Surfers Paradise. The photographers who know it differently are shooting Bortle 2 dark skies from the Scenic Rim, rainforest waterfalls inside UNESCO World Heritage listed forest, and hexagonal basalt formations on the coast that most Australians don't even know exist.
I scouted this region with a specific brief: to prove that you could build a five-day photography trip covering mountains, rainforest, and coastline without driving more than 90 minutes between any two locations. The result was a route that now underpins a workshop I run twice a year — and this guide is built from the notes, GPS waypoints, and field lessons that came out of that scouting trip and every session since.
The four primary locations here — Mount Barney, Lamington, Currumbin Rock, and Fingal Head — each teach something completely different. That's the point. Within a single trip you move from nightscape technique to long-exposure waterfalls to tide-led seascapes to basalt geology. Few regions in Australia offer that in one compact drive.
Mount Barney — Bortle 2 Dark Skies and Volcanic Drama
Mount Barney is Queensland's second highest peak and the anchor of the Scenic Rim — a volcanic spine rising out of the hinterland about 90 minutes southwest of Brisbane. For photographers, the main draw is simple: Bortle 2 dark sky you can drive to. SQM readings around 21.95 mag/arcsec² have been recorded at Yellow Pinch Lookout, with artificial sky brightness sitting at roughly 8.07 μcd/m². That's one of the darkest accessible locations in southeast Queensland, and it sits within view of one of the most dramatic mountain silhouettes in the state.
Yellow Pinch Lookout is the primary shooting position for astro work. It gives you clear sightlines toward the mountain's eastern face, which is where you want the Milky Way core in May when it rises out of the east and arcs across the ridgeline. The scale of Mount Barney as a foreground subject is something you don't quite appreciate from maps — standing at the lookout at night, the volcanic spine fills a significant portion of the frame even at 14mm. In August the core is higher earlier and tracks differently, giving you a second compositional option from the same location.
Sunrise at Mount Barney is a different experience. The morning light moves through the valley slowly, and the best frames often come from roadside positions rather than any formal lookout. Blue hour in the Scenic Rim is subtle — gradual tonal shifts across the ridgelines rather than explosive colour — and it rewards patience over speed. On clear winter mornings with cold air in the valleys, low mist can collect below the ridgeline and give you a completely different compositional layer.

Why May and August specifically?
The workshop timing is calculated, not arbitrary. In May, the galactic core rises in the east — perfect for compositions where the Milky Way emerges directly over Mount Barney's eastern face. In August, the core is higher earlier in the evening and has shifted its orientation, giving you a different angle over the same foreground. Temperatures in both months are manageable for night work at elevation. Summer in the Scenic Rim means heat, humidity, and a sky that never really gets dark enough early enough to shoot comfortably.
Lamington National Park — Rainforest Waterfalls and Slow Photography
Lamington is a completely different environment to Mount Barney — dense, green, humid, and slow. It's the kind of place where rushing produces nothing useful, and patience produces something special. The Green Mountains section of the park covers subtropical and temperate rainforest on the McPherson Range at around 900–1000m elevation, and it contains some of the best waterfall photography terrain in southeast Queensland.
Elabana Falls is the standout location — a 30-metre cascade with consistent year-round flow, fern-framed foreground pools, and good compositional options at multiple distances. The Box Forest Circuit connects it to a series of smaller cascades along Canungra Creek. Toolona Creek Circuit has additional waterfall options for a longer day. The tracks are uneven, often damp underfoot, and can be physically demanding with a full camera pack — pacing matters more than coverage.
The light timing problem
Lamington's rainforest canopy is both the asset and the challenge. It diffuses and softens overhead light beautifully — but only when the light itself is diffuse. Direct overhead sunlight creates harsh shadows on wet rock, blown highlights where the sun punches through canopy gaps, and patchy dappled light that is nearly impossible to balance across a wide-angle composition. The fix is simple but firm: shoot early morning before 9am, late afternoon after 3pm, or on overcast days. All three produce dramatically better results than mid-day on a clear day.
Polariser technique — the thing people get wrong
A polariser is essential at Lamington, but most people don't use it correctly. Rotate it slowly while watching through the viewfinder in real time — you'll see the exact moment reflections cut from wet rock surfaces and the greens deepen without going unrealistically saturated. Stop there. Going further lifts the exposure requirement and starts flattening the tonal range. The sweet spot is visible, not calculated.
Shutter speed and flow
0.5 to 2 seconds gives you silky water movement with retained texture in the cascade. Push beyond 5–10 seconds and the water turns into a flat white mass with no detail. In the field, take test shots at 0.5s, 1s, and 2s, then decide which level of motion suits the scene. The right answer depends on how fast the water is moving and how much foreground rock you want to read cleanly.
Currumbin Rock — 360° Seascape and Astro Opportunity
Currumbin Rock is the coastal anchor of this route and one of the most versatile photography locations on the Gold Coast. The rock shelf creates strong natural leading lines toward the horizon. Tidal channels funnel water through gaps in the platform — useful for long-exposure seascapes where the ocean smooths into motion blur between the exposed rock edges. And on clear new-moon nights from April through August, the Milky Way rises directly out of the Pacific Ocean to the east.
In May, the galactic core emerges from the ocean at dusk and arcs over Currumbin Rock as the primary foreground subject. In August, the core has shifted and sets over the western horizon instead, giving you a completely different composition from the same platform. Same location, two distinct astro seasons, two entirely different images.
Tide strategy
Low tide at 0.5m or lower exposes the full rock shelf. Tidal pools form between the rock sections and reflect sky colour — useful for foreground interest in both seascape and astro compositions. At mid to high tide the platform shrinks and wave energy increases, which suits different shutter work. Check tides on Willyweather 24 hours ahead, then adjust positioning on the day based on how the swell is interacting with the platform edge. The tidal channels are the compositional anchor — position yourself so a channel leads from foreground toward your background subject.
Wave timing
Count wave sets before committing to an exposure. The strongest waves tend to come in sets of three to five. Start your exposure on the pull — when water recedes back over the rock — and the motion blur will be smoother and more directional than if you start on the surge. For this image at Currumbin, I used 1/5s to hold a sense of water movement while keeping more texture and energy in the scene. A 6-stop ND filter handles most mid-morning and late-afternoon light levels when you want to drag the shutter further.
Fingal Head — Australia's Answer to the Giant's Causeway
Most Australians have heard of the Giant's Causeway in Northern Ireland — 40,000 interlocking hexagonal basalt columns formed by volcanic cooling around 50–60 million years ago. What very few Australians know is that we have our own version, just over the Queensland border in northern New South Wales. Fingal Head sits about 10 minutes south of Coolangatta, and while it's technically NSW, it's a straightforward drive from the Gold Coast that most photographers on this route treat as part of the same trip.
The basalt columns at Fingal Head formed from the Tweed Volcano around 17 million years ago. Erosion has exposed the hexagonal jointing across a dramatic low causeway that extends into the ocean. At low tide the full length of the columns is exposed, and sunrise works best when the scene is backlit — with light lifting through the water and around the basalt formations to create depth, separation, and atmosphere with the Pacific behind.
When the light works
Fingal Head is a sunrise location. The causeway faces roughly east, and the strongest compositions here are usually backlit rather than side-lit. As the sun lifts, light comes through the water and behind the basalt formations, giving the scene more glow, atmosphere, and separation than flatter front-on light. Arrive 45 minutes before sunrise, scout composition at the water's edge, and be set up before the light peaks. The best window is that early sunrise phase when the backlight is clean and the water still holds colour and translucency.
In May, if the timing aligns, the Milky Way is still above the eastern horizon in the pre-dawn window. The combination of basalt columns in the foreground and the galactic core rising over the ocean behind them is one of the most compelling astro compositions on the entire east coast.
Swell and safety
The causeway is always wet and always slippery. Swell above 2 metres means waves clear the columns and the location becomes unsafe. Check Willyweather or Swellnet the evening before — if swell is elevated, a seascape from the beach or headland above is a safe and still-worthwhile alternative. Never position yourself between the ocean and the column field when conditions are marginal.
Other Locations Worth Knowing
The Gold Coast hinterland and surrounding region has more photography territory than any single trip can cover. The four primary locations above are the ones I've scouted in depth and built workshop content around. The locations below are worth knowing — either as day-trip additions or as starting points for future visits.
Planning Your Gold Coast Photography Trip
The four primary locations here span about 130km from Mount Barney in the southwest to Fingal Head in the southeast. The logical route moves from inland to coast — start at Mount Barney for the darkest sky and mountain work, move through Lamington for the rainforest and waterfall sessions, then finish on the coast at Currumbin and Fingal. That order also matches the teaching progression from most technically demanding (astro, night work, mountain conditions) to most accessible (coastal seascape, geology, daytime light).
| Location | Best season | Best time of day | Primary discipline | Drive from BNE |
|---|---|---|---|---|
| Mount Barney | May + August | Dusk, night, pre-dawn | Astrophotography, landscape | ~90 min |
| Lamington NP | Year-round (overcast best) | Early morning, late afternoon | Waterfall, rainforest | ~100 min |
| Currumbin Rock | Apr–Aug for astro; year-round seascape | Sunrise, sunset, low tide | Seascape, astrophotography | ~75 min |
| Fingal Head | Apr–Aug for astro; year-round seascape | Sunrise — backlit basalt | Seascape, geology, astro | ~85 min |
Essential apps for this region
PhotoPills for Milky Way arc planning at Mount Barney and Currumbin — confirm the core azimuth and elevation for your exact GPS and date before committing to a composition. Willyweather for tide heights at Currumbin and Fingal — aim for 0.5m or lower. Swellnet for swell at Fingal — anything over 2m makes the causeway unsafe. BOM for broader weather before a hinterland drive. Light Pollution Map to confirm Bortle ratings and sky glow direction at each location.
Gear for the full route
For Mount Barney and Currumbin astro: fast wide lens at f/2.8 or faster, star tracker if you have one, red-mode headlamp, warm layers (12–15°C nights in May and August). For Lamington: circular polariser is essential, sturdy tripod, waterproof bag cover for humid conditions. For Fingal: microfibre cloth for spray on the front element, low-profile tripod position on wet basalt, and non-slip footwear.
Photography Workshops at These Locations
Dylan Knight Photography runs a small-group Gold Coast Hinterland Photography Workshop across these four locations twice a year — timed around May and August for optimal Milky Way alignment and comfortable working conditions. The workshop covers all four primary locations across five days, with field sessions at each site, daily editing sessions, and a conditions-led approach that adapts to weather, tide, and sky on the day.
Sessions cover astrophotography workflow at Mount Barney (including star tracker use and tracked sky blending), long-exposure waterfall technique and polariser use at Lamington, tide-led seascape work at Currumbin, and sunrise basalt composition at Fingal Head. Maximum group size is kept deliberately small — never more than four participants — to maintain a genuine instructor-to-photographer ratio and ensure the coaching is personalised rather than generic.
Participants leave with edited images from each location, a repeatable capture and post-processing workflow, and practical field notes for returning independently. If the night session at Mount Barney is weathered out, the workshop includes tracked Milky Way RAW files for workflow training in the editing sessions.
Shoot These Locations with a Guide
Small-group workshops across Mount Barney, Lamington, Currumbin, and Fingal Head. Field sessions, daily editing critique, conditions-led approach, and all permits handled. Maximum four participants.
How to Photograph the Milky Way Australia
Milky Way Season Australia: Best Months, Direction & Camera Settings
A complete guide built for Australian conditions — when to shoot, which direction to face each month, southern hemisphere direction logic, camera settings by scenario, focusing in the dark, and practical location advice from South-East Queensland to the Red Centre.
The best time to photograph the Milky Way in Australia is April through August. The Galactic Centre is visible from around February to October, but the April to August window gives most photographers the best combination of darker skies, earlier evening timing, cleaner winter air, and stronger compositions.
February and March can work, but the core rises later and coastal humidity is often higher. October is still possible, though the evening window is shorter. The sweet spot — where everything lines up most reliably — is the five months of the Australian autumn and winter season.
Most Milky Way guides are written for the northern hemisphere. They get the direction logic backwards, gloss over Australian humidity and transparency, and rarely explain how different our seasonal windows feel in practice. This guide is built for Australian conditions — real locations, real settings, and real field experience.
Australia is outrageously well suited to astro. We occupy only a small fraction of the continent, which leaves huge inland areas in genuine dark-sky country. Whether you're shooting with a kit lens from a paddock in the Wheatbelt or building a tracked composite in the Outback, the aim here is simple: sharper files, cleaner skies, and a workflow you can actually repeat.
Season, Timing & Planning an Australian Milky Way Shoot
When is Milky Way season in Australia?
The Galactic Centre is visible from approximately February to October. In practice, the easiest and most rewarding stretch for most of Australia is April to August, when nights are longer, the core is easier to place in evening compositions, and inland winter air is often cleaner and drier.
February and March can absolutely work, but the core rises later and summer humidity is often higher, especially in Queensland and other coastal regions. By April the season becomes much more forgiving, and by winter you get a better mix of darkness, timing, and transparency.
Moon phase matters more than most people think
For a clean Milky Way core, aim for roughly new moon plus or minus four days. Beyond that, moonlight starts lifting the sky background enough to reduce contrast in the dust lanes and fainter outer structure. If the moon is up on the same side of the sky you're trying to shoot, it can ruin the shot faster than most people expect.
The main exception is when you're deliberately planning a blended foreground, a blue-hour composite, or a scene where a late-rising crescent gives you just enough foreground fill without washing out the sky earlier in the session.
Weather and transparency
Clear skies are the starting point, but transparency decides how crisp and contrasty the result feels. Thin high haze, coastal moisture, or dust in the air can kill detail even when the sky looks clear to your eyes.
My standard planning stack: PhotoPills for timing, Clear Outside for layered cloud, BOM for the broader weather picture, Windy for wind and upper atmosphere context, and Light Pollution Map for Bortle and local sky glow reality.
Coastal vs inland reality
For South-East Queensland especially, an inland drive is often the single biggest image-quality upgrade you can make. Coastal humidity softens detail, increases sky glow, and raises the chance of dew on your front element. Move inland and the difference is usually obvious in both contrast and keeper rate.

Australian Direction Logic — What Northern Hemisphere Guides Get Wrong
In Australia, the Galactic Centre starts the season low between the east and south-east. As the season progresses, it rises earlier, climbs higher, and can stand much more upright as it tracks toward the northern part of the sky. Later in the season, after rotating through that higher northerly position, it tips over and drops toward the western horizon, where the lower, more horizontal look returns.
Think in phases: east early, north mid, west late. The exact angle shifts with latitude, so use this as planning logic, not a rigid rule.
low, rises late
late evening
stronger rise
climbs higher
high, more upright
vertical / flipping
tips over west
lower, shorter
brief dusk window
Using PhotoPills for Australian direction planning
PhotoPills is the easiest way to confirm exactly where the core will sit for your location, date, and time. The key is not just knowing whether the core is up, but what angle it will be on — whether it is still rising low in the east, standing upright toward the north, or has already tipped over toward the west. That lets you decide whether the scene suits a low sweeping composition, a vertical core, or whether you should simply wait another hour or two for the orientation you actually want.
Camera Settings by Scenario — Start Here, Then Refine
Just use ISO 3200 and f/2.8 is not wrong, but it ignores tracker use, sensor size, coastal haze, and how your particular lens behaves wide open. Use the table below as your starting point, then check the histogram and the stars at 100% before settling in.
| Scenario | Aperture | Shutter | ISO | Notes |
|---|---|---|---|---|
| Full-frame, dark sky (Bortle ≤4), no tracker | f/2–f/2.8 | 15–20s | ISO 3200 | Reliable baseline. Check 100% for trailing. 20s is often safer than pushing longer on high-resolution bodies. |
| Full-frame, coastal / suburban (Bortle 5–6) | f/2–f/2.8 | 10–15s | ISO 2000–3200 | Brighter sky means less tolerance. Do not chase exposure by blasting ISO if the sky itself is the problem. |
| APS-C, dark sky, no tracker | f/2–f/2.8 | 10–15s | ISO 3200–6400 | Crop factor makes trailing show up sooner. Use a shorter shutter and accept the ISO trade. |
| Full-frame + tracker (tracked sky, separate foreground) | f/2.8–f/4 | 60–180s | ISO 800–1600 | Run multiple tracked exposures, then stack. Separate foreground exposure keeps the workflow cleaner. |
| APS-C + tracker | f/2.8 | 60–120s | ISO 1600 | This is where APS-C benefits massively. Even a modest tracked stack is a big jump from single-shot ISO 6400. |
| Wide-angle full-frame (14–20mm), dark sky | f/2–f/2.8 | 15–20s | ISO 3200 | Use the NPF Rule in PhotoPills as your starting point, then confirm at 100% on the back of the camera. High-resolution bodies usually need a shorter shutter than older rules suggest. |
| Foreground blend / blue-hour foreground | f/8–f/11 | Varies | ISO 100–400 | Shoot the foreground separately and merge later. Cleaner than forcing everything into one compromise exposure. |
The NPF Rule — better than the old 500 Rule
The old 500 Rule is still a rough ballpark, but it is too loose for many modern high-resolution cameras. A more accurate approach is the NPF Rule, which takes into account focal length, aperture, and camera resolution to give a more realistic maximum shutter speed before stars start to trail. Open the Spot Stars calculator in PhotoPills and use the NPF result as your starting point, then take a test shot, zoom to 100%, and shorten the shutter further if your stars still look stretched.
How to Focus on Stars at Night — Exact Steps, No Guesswork
Blurry stars are the most common failure mode I see in workshop files. Not noise, not white balance, not the camera body. Focus. This is the exact method I teach in the field.
Turn autofocus off completely. You need full control and magnified live view on the rear screen.
Jupiter, Venus, or a very bright star makes the process much easier than trying to focus on a dim point.
Go to maximum zoom so the star becomes a blob you can actually refine.
Most lenses do not hit true astro infinity exactly where the barrel markings suggest. Go slowly.
When the blob gets larger again, you've passed the sharpest point. Back up until it is smallest and cleanest.
Check a centre star and then a corner. Centre sharp and corners slightly worse is normal for fast wide-angle lenses. Centre soft means refocus.
A small piece of gaffer tape across the focus ring can save you from accidental movement during reframing.

Focus failure modes — quick diagnosis
| What you see | Cause | Fix |
|---|---|---|
| Stars with tails / streaks | Shutter speed too long | Reduce shutter speed and recheck at 100%. |
| Stars uniformly soft | Missed focus | Redo the live view focus method. Ignore the infinity mark. |
| Stars sharp, foreground blurry | Normal when focused at infinity | Shoot a separate foreground if you need depth front to back. |
| Corners messy, centre sharp | Lens aberration / coma wide open | Stop down slightly and raise ISO if needed. |
| Focus shifts after reframing | Ring moved accidentally | Retest focus before the next sequence. |
Reducing Noise in Milky Way Photography
Noise is part of the job in low-light astrophotography. The aim is not to create a plastic-looking file. The aim is to get enough signal into the RAW file that your clean-up is gentle, not destructive.
Star Tracker vs No Tracker — Honest Assessment
A tracker is not required to take a good Milky Way image. But it does change what good can look like at full size. Here is the practical version, without the gear hype.
No tracker
- Fast setup and simple workflow
- Great for wide environmental compositions
- Works with any camera and tripod
- Ideal for learning focus, timing, and composition
- Stacking a short series of frames can get you surprisingly far
With tracker
- Much cleaner files at lower ISO
- Longer exposures reveal more faint structure
- Bigger payoff for larger prints and competition-level output
- Adds setup time, alignment, and another failure point
- Usually means a separate foreground workflow
Best Milky Way Locations in Australia
Australia is one of the best countries on earth for Milky Way photography: huge dark-sky regions, genuine Bortle 1–2 areas, desert foregrounds, coastal rock platforms, alpine country, and enough latitude spread to give you a lot to work with. Because the inhabited footprint of the country is relatively small, huge parts of the interior stay properly dark.
Common Mistakes I See in Workshops
These are real mistakes from the field, not theory pulled from forums.
Most lenses focus past true infinity for astro. The engraved mark is not your sharp point.
Fix: use live view every shoot, then secure the ring if needed.The rear screen can lie to you at normal review size. Soft stars often look fine until you zoom in properly.
Fix: check one centre star and one corner before committing to the set.Beautiful foreground, wrong sky. It happens constantly when people skip planning.
Fix: screenshot the PhotoPills plan before leaving home.Even a modest moon can lift the whole sky background faster than expected once it enters the scene.
Fix: plan around exact local moonrise and finish before it becomes a problem.Dark files pushed hard in post usually look worse than properly exposed high-ISO files.
Fix: expose for usable sky detail, not for fear.Especially in Queensland, the air can look clear while still flattening contrast and fogging the front element.
Fix: go inland when you can and carry dew management.Real Examples with Full EXIF
These are real Australian Milky Way images with exact capture settings for both foreground and tracked sky. They show the range of approaches — twilight blends, night blends, tracked composites, and panoramas.


Frequently Asked Questions
Take the Next Step in the Field
Download the free Australian Milky Way cheat sheet — a one-page quick reference for settings, focus steps, and a field workflow you can use in the dark.
5 Best Milky Way Photography Spots Near Brisbane
5 Best Milky Way Photography Spots
Within ~2 Hours of Brisbane
Bortle 2 dark skies, coastal foregrounds, and the mistakes I made so you do not waste a clear night. This guide covers the five Milky Way locations I keep coming back to in South-East Queensland, with GPS coordinates, best months, settings, and the small details that actually make or break the shoot.
One of the most common questions I get from South-East Queensland photographers is simple: where do you actually go to shoot the Milky Way without turning it into a full overnight mission? After years of scouting, testing, missing, and going back again, I keep coming back to the same five locations. Two give you genuinely dark Bortle 2 skies. Three are closer, brighter, and still very workable if you understand what they are good at.
This is not a generic list of pretty viewpoints. These are locations I have shot enough times to know what works, what does not, and what usually goes wrong the first time. You will get the GPS coordinates, best months, the type of Milky Way composition each spot suits, the settings I have used there, and the practical issues that quietly ruin shoots, like wind, dew, light spill, salt spray, mist, or the lighthouse beam suddenly blowing your highlights.
If you are looking for the best Milky Way photography locations near Brisbane, this is the straight version. No fluff. Just the five spots worth knowing and how to shoot them properly.
If you are in Brisbane, the Sunshine Coast, or the Gold Coast and want realistic Milky Way options within a reasonable drive, these are the locations I would shortlist first. If you only care about absolute darkness, start with Mount Barney and Borumba Dam. If you care about accessibility and recognisable foregrounds, Wildhorse, Noosa, and Point Cartwright are the smarter play.

This is one of the best dark-sky locations within reach of Brisbane, full stop. On a clear night the Milky Way looks obvious to the naked eye, and the twin peaks give you a foreground that actually feels like a destination rather than just a patch of open sky. If you want the classic South-East Queensland mountain-meets-core composition, this is the one.
The galactic core rises in the east from around February, but the stronger compositions here are later in season when you can frame the core setting or leaning over the western side of the mountain. The exact alignment shifts a lot through the season, so this is one of those locations where PhotoPills matters.
There are a few ways to shoot it, but Yellow Pinch is the best-known option for a reason. The view opens up properly once you move beyond the easiest access points. Shooting down low near the lodge or car park can work, but you need to manage stray light carefully.
I shot too low from the main access area on my first visits and underestimated how much the lodge lights would contaminate the foreground. The darkness is excellent, but local light spill can still ruin the feel of the shot if your angle is lazy.
Tracked composite. Twilight foreground at f/11, 1/20 sec, ISO 64, 14mm. Sky tracked at f/4, 3 min, ISO 800, 14mm. Manual focus on a bright star and lock it in before the real shoot starts.
Mount Barney is the place to slow down and do it properly. Dark sky hides a lot of mistakes, but it also rewards better composition more than any other spot on this list.

Borumba is the backup plan that is good enough to stop feeling like a backup. Same genuine darkness as Mount Barney, but a completely different kind of image. You are working with water, reflections, open horizon, and a more forgiving setup area. When the surface goes still, it can produce one of the cleanest Milky Way reflection frames you will get anywhere near South-East Queensland.
The catch is that the reflection only exists when the dam is calm. A little bit of wind and the magic is gone. That is why Borumba is a location I decide on late. It is one of the few astro spots where wind speed matters almost as much as cloud cover.
If you see mist forming over the water, move higher immediately. It looks atmospheric for about five minutes, then turns into a wall between you and the stars. Dew is also common here, so a lens warmer is worth bringing every time.
Check Windy before you commit. If the wind is above about 10 km/h after sunset, stop chasing reflections and change the plan. Shoot from higher ground or accept that it is a sky-only night.
Sky tracked at f/4, 3 min, ISO 800, 14mm. Foreground at f/2.8, 3 min, ISO 3200, 14mm. For calm-water reflection attempts, I work in the 8–13 sec range when the conditions allow it.
Borumba is the best spot on this list for photographers who want clean Milky Way work without a steep access or technical foreground problem.
Wildhorse is the practical choice. It is not the darkest. It is not the cleanest. But it is the easiest decent Milky Way location to actually use when you have work the next day and still want to get out under the stars. That matters more than people admit.
The elevated lookout helps cut through some of the surrounding light pollution, and the Glass House Mountains give you a recognisable horizon. Early season the core is more eastern. Mid to late season is when it gets more interesting, as the Milky Way shifts into better western compositions over the range.
This location rewards better technique because the sky is not doing all the work for you. If you are sloppy with exposure, horizon glow, or tripod stability, the files fall apart fast. If you shoot carefully, it can still deliver strong results.
If you do not have a tracker or a stacking workflow, a light pollution filter can make a surprisingly useful difference here. This is one of the few locations where small technical gains really show up in the final file.
Foreground at ISO 800, f/1.4, 30 sec, 50mm. Sky tracked at f/4, 3 min, ISO 800, 14mm. In post, I usually pull highlights down hard and add a controlled amount of Dehaze to recover contrast in the core.
Hook your camera bag under the tripod. Even a modest breeze on that platform can soften frames and waste a clear night.

This one earns its place because it solves a specific problem. If you want the Milky Way rising over the ocean, this is one of the cleanest accessible options in South-East Queensland. Inland spots cannot give you that eastern water horizon, and that alone makes Noosa worth the drive.
Timing is everything here. The core is there, but the air quality decides whether the file looks crisp or washed out. Offshore winds are your friend. Onshore winds and heavy salt in the air will quietly soften your stars until you get home and realise the whole session has a haze on it.
This is also one of those spots that becomes easier once you scout it in daylight. The track, headland positions, and safe setup options make a lot more sense after a quick sunset or sunrise reconnaissance.
Check the coastal forecast, not just the general forecast. Above about 15 km/h onshore, your front element can coat up fast. A clear high-pressure night with a light offshore breeze is the play.
Foreground at ISO 64, f/11, 30 sec, 14mm. Sky tracked at f/4, 3 min, ISO 800, 14mm. Keep a microfibre cloth in your pocket and actually use it.
If your goal is a coastal Milky Way shot that does not look like every inland dark-sky frame, Noosa is one of the smartest options on this whole list.

Point Cartwright is not on this list because it is dark. It is on this list because the lighthouse gives you one of the most recognisable astro foregrounds in South-East Queensland, and sometimes composition beats darkness. If you want a location that feels iconic straight away, this is it.
The lighthouse beam is the challenge and the opportunity. It can blow your highlights when it clips the frame, but it can also act as a natural light source that gives the foreground life. When you get the timing right, it does something light painting usually cannot.
The headland is exposed almost every time, so tripod discipline matters. No centre column. Thickest leg sections first. Stay low. Wipe your front element regularly because salt spray is constant here, especially if there is any swell and breeze working together.
Check your histogram after every frame. The lighthouse beam can turn a perfectly exposed setup into a spiked mess if it hits during the wrong moment in the exposure.
Foreground at ISO 3200, f/2.8, 13 sec, 14mm. Sky tracked at f/4, 3 min, ISO 800, 14mm. Stability matters more here than chasing one extra stop of light.
This is one of the best “I have a short weather window, let’s go now” astro locations on the Sunshine Coast.
The 3 Things That Matter Most
Moon phase
- Plan around new moon, ideally within ±3 days
- Even a modest moon can flatten contrast badly at Bortle 4 sites
- If the moon is up during your main core window, rethink the night
Cloud cover
- Check Windy again about 6 hours before leaving
- Layer maps matter more than a generic rain forecast
- If you are seeing meaningful cloud after 9 pm, do not force it
Galactic core position
- The core is not visible year-round from South-East Queensland
- Best season runs roughly February through October
- Use PhotoPills for exact rise angle and direction on your date
| Location | Best for | Darkness | Best months | Main issue |
|---|---|---|---|---|
| Mount Barney | Classic dark-sky mountain composition | Bortle 2 | Apr–Sep | Light spill if you shoot too low |
| Borumba Dam | Reflections and easy dark-sky access | Bortle 2 | May–Oct | Wind, dew, mist over water |
| Wildhorse Mountain | Closest practical Brisbane option | Bortle 4 | Feb–Oct | Wind and ambient glow |
| Noosa, Alexandria Bay | Milky Way rising over the ocean | Bortle 4 | Feb–Jun | Salt spray and humidity |
| Point Cartwright | Lighthouse foreground astro | Bortle 4 | Mar–Jul | Wind and lighthouse beam timing |
If you only get one or two clear astro windows a month, stop picking locations on vibe alone. Pick the place that best suits the conditions that night. Calm and clear? Borumba. Dry and dark? Mount Barney. Short notice after work? Wildhorse. Offshore coastal night? Noosa. Windy but compositional? Point Cartwright.
FAQ
Learn These Spots Properly,
On Location
I run small-group workshops across these South-East Queensland locations throughout the year, including Noosa, Point Cartwright, Mount Barney, and the Gold Coast hinterland. Conditions-led planning, hands-on field tuition, and editing sessions built around real locations, not theory.
Small groups, real planning, no guesswork

Gold at One Eyeland: A Milestone for Dylan Knight Photography
September 2025 – Sunshine Coast, Australia
I’m honoured to share that I’ve been awarded Gold at the One Eyeland Photography Awards (2024 edition, announced September 2025) — recognised as the world’s largest photography awards, with more than 3,000 images entered from 51 countries this year. Alongside the Gold, two of my images received Bronze in the Nightscape and Abstract categories.
As an international award-winning photographer, Dylan Knight, this marks my first Gold on the global stage — and it’s a milestone I’ll treasure.
The Winning Images
Tree of Erosion (Gold, Aerial)
An abstract aerial image that reveals erosion lines like brushstrokes across the earth’s surface.Celestial Crown (Bronze, Nightscape)
The Milky Way rising above the ridges of Utah, stitched and tracked to capture the arc in fine detail.Ancient Light Over Goblin Valley (Bronze, Nightscape)
A panoramic nightscape created under clear-sky conditions, blending foreground depth with a sky alive in airglow.

Why It Matters
Awards are milestones, not destinations. They reflect years of persistence, planning, and countless hours in the field. For me, this Gold at One Eyeland isn’t about the trophy — it’s about proof that dedication to craft, storytelling, and technical precision resonates internationally.
This recognition sits alongside other recent highlights for Dylan Knight Photography, including:
Finalist, The Mono Awards (Top 60 Places, 2025); Highly Commended (2019 & 2024)
Honourable Mention, International Photography Awards (2025)
Silver & Commended, Australian Photographic Prize (2024)
Lessons Behind the Lens
Each award image carries lessons that go beyond competitions:
Wait for conditions — the best light, airglow, or atmosphere can’t be rushed.
See differently — abstracts and aerials often hide in plain sight.
Simplify your frame — remove distractions and let the subject breathe.
These are the same principles I teach in workshops, because they’re what transform a good frame into a lasting image.
Looking Ahead
After nearly a decade behind the camera, my mission is simple: to guide others into wild places, share the skills and stories I’ve learned, and help you create images you can be proud of. Photography is more than awards — it’s about the moments you capture and treasure long after the shutter clicks.
If you’d like to learn the techniques behind award-winning astrophotography and landscape images, join me on a 2026 workshop across the Sunshine Coast, Noosa, Gold Coast, Sapphire Coast, Uluru, or New Zealand’s South Island.

2025 Australian Photographic Prize — Full Image Breakdown Series
2025 Australian Photographic Prize — Full Image Breakdown Series
One Silver and four Highly Commendeds. Here’s exactly what worked, what didn’t, and how to push toward Gold.
- Silver — Remote Waterfall Nightscape (Score 83, Photographic Artist)
- Highly Commended — Coastal Drama at Sunrise (Score 78, Nature)
- Highly Commended — Tidal Flow & Morning Glow (Score 77, Landscape)
- Highly Commended — Forest Isolation (Score 75, Nature)
- Highly Commended — Headland Light & Motion (Score 75, Landscape)

Headland Light and Motion — How It Earned a Highly Commended at the 2025 APP
Headland Light & Motion — How It Earned a Highly Commended at the 2025 Australian Photographic Prize

Submitted: 22 June 2025 | Location: Coastal headland, Queensland
Story Behind the Shot
Warm light kisses the headland while incoming waves rush the lens. Aim: balance landmark, light, and motion in one cohesive frame.
Why It Scored Well
- Golden side-light creates a clear focal anchor.
- Leading water motion pulls the viewer into scene.
- Good vertical balance between sky, land, water.
Where It Could Improve
- White-water highlights verge on clipping; blend to retain texture.
- Cloud structure pleasant but not dramatic; impacts overall “wow”.
- Mild haze softens headland micro-contrast; CPL/clarity could help.
Lessons
- Expose for whites in surf; recover shadows later.
- Plan for days when sky and foreground both peak.
- Use polarisation to manage glare and haze.
Return to the series hub • See upcoming dates.

Forest Isolation — How It Earned a Highly Commended at the 2025 APP
Forest Isolation — How It Earned a Highly Commended at the 2025 Australian Photographic Prize

Submitted: 22 June 2025 | Location: Plantation forest, Southeast Queensland
Story Behind the Shot
A lone sapling punctuates a grid of charred trunks—an exercise in minimalism, contrast, and restraint.
Why It Scored Well
- Clear subject isolation; strong visual hierarchy.
- Rich greens vs deep blacks create graphic punch.
- Orderly geometry suits minimalist Nature work.
Where It Could Improve
- Light is a little flat; angled side-light would add depth.
- Micro-verticals could be refined for absolute symmetry.
- Selective tonal separation in mid-ground to enhance depth.
Lessons
- Minimalism thrives on perfect alignment—check your verticals.
- Subtle dodging can guide the eye without breaking realism.
- Return when light cuts across trunks for texture.
Browse the series hub • Join a landscape workshop.

Coastal Drama at Sunrise — How It Earned a Highly Commended at the 2025 APP
Coastal Drama at Sunrise — How It Earned a Highly Commended at the 2025 Australian Photographic Prize

Submitted: 22 June 2025 | Location: Exposed coastal headland, Kiama
Story Behind the Shot
A sculptural breaker against a dark horizon. Intent: minimalist, high-impact form with crisp spray and strong tonal separation.
Why It Scored Well
- Excellent timing—peak action frozen at maximum shape.
- Powerful contrast; negative space isolates the subject.
- Clean presentation suits the Nature category’s emphasis on authenticity.
Where It Could Improve
- Spray tips show slight motion softness; faster shutter could help.
- Shadow mid-tones a touch compressed; modest lift may reveal texture.
- Side-light at a lower sun angle might add micro-contrast to spray.
Lessons
- Study wave sets; pre-focus and commit to the decisive moment.
- Dark backgrounds amplify shape—compose for separation.
- Test 1/1000–1/4000s to find your ideal spray texture.
Read the series hub or join a seascape workshop.

Tidal Flow and Morning Glow — How It Earned a Highly Commended at the 2025 APP
Tidal Flow & Morning Glow — How It Earned a Highly Commended at the 2025 Australian Photographic Prize

Submitted: 22 June 2025 | Location: Rugged coastline, Eastern Australia
Story Behind the Shot
Pastel dawn sky meets surging flow across jagged rock. Objective: keep movement alive without losing texture or highlight detail.
Why It Scored Well
- Compelling lead-in lines; water flow drives the eye.
- Warm sky hues play against cool water—pleasing colour contrast.
- Good timing on shutter for streak texture.
Where It Could Improve
- Slight edge softness in extreme foreground; micro-focus adjust or faster shutter.
- Some highlight streaks approach clipping; blend/bracket to protect whites.
- Sky structure is gentle; higher drama could lift impact score.
Lessons
- Use graduated ND or bracket for flow highlights.
- Angle for side-light to enhance foreground texture.
- Revisit when sky energy matches a strong foreground.
See the series hub • Book a seascape session.

Remote Waterfall Nightscape — How It Earned Silver at the 2025 Australian Photographic Prize
Remote Waterfall Nightscape — How It Earned Silver at the 2025 Australian Photographic Prize

Submitted: 22 June 2025 | Location: Remote waterfall, Northern Australia
Story Behind the Shot
Clear, moonless conditions with the Milky Way arcing above a cascading fall. Goal: pair dynamic water texture with crisp stars for a moody, painterly nightscape.
Why It Scored Well
- Balanced composition guiding the eye from foreground flow to galactic core.
- Exposure control across extreme dynamic range; stars remain detailed.
- Creative cohesion suited to Photographic Artist—strong narrative and atmosphere.
Where It Could Improve
- Very slight star elongation at 100%; shorter shutter or tracker would lift technical score.
- Minor highlight clipping in lower cascades.
- Shadow detail in foreground could be lifted subtly without noise.
Lessons for Photographers
- Pre-plan Milky Way alignment and water levels; timing is everything.
- Bracket or blend to balance white water and dark sky.
- Consider tracked/stacked sky + untracked water for technical polish.
Learn more: See the full series hub here • Interested in my Nightscape workshops? View dates.
8 Best Photography Locations in Noosa National Park
8 Best Photography
Locations in
Noosa National Park
Noosa National Park sits roughly 140 kilometres north of Brisbane, and after running photography workshops on this headland since 2022, I'd argue it's the most technically diverse coastal park in South-East Queensland for photography. West-facing headlands, east-facing coves, dark-sky bays and tidal rock pools — all connected by a single coastal trail. You can photograph sunrise over Tea Tree Bay, cross the headland for golden-hour boulders at Granite Bay at sunset, then return under a new moon in April and capture the Milky Way rising over the same foreground. Few locations in Australia let you do all of that without moving your car.
Most Noosa National Park photography guides cover the obvious spots and stop there. What they miss is the astrophotography potential, the tide strategy that separates a good frame from a great one, and the compliance picture that determines what's available to commercial workshop operators versus independent visitors. This guide covers all eight best photography locations in Noosa National Park — with verified GPS coordinates, honest tide notes, specific gear recommendations, seasonal timing, and a straight answer on permits. Whether you're planning a solo sunrise shoot, a Noosa landscape photography trip, or a guided workshop experience, this is the complete reference.
The park's northern headland sits far enough from Noosa's town lights to deliver genuinely dark skies to the south and east from April through August. Alexandria Bay in particular is one of the best astrophotography locations on the Sunshine Coast — the 25-minute walk to get there is exactly what keeps it dark and uncrowded even on peak season weekends.
The Boiling Pot channels incoming surf through a narrow basalt gulley and creates explosive spray. Short shutter speeds freeze the chaos; longer exposures turn it into something painterly. The east-facing aspect means direct sunrise light from roughly 5:30 am through 7 am. I come back to this spot every single workshop.
Stay behind the railing. Rogue waves hit at mid-tide and they're fast. I've seen experienced photographers caught off-guard here. The rail also doubles as a stable shooting platform for slower shutter work in calmer conditions.
Insider edit: Use a luminance range mask in Lightroom to warm highlights only — keeps the glow on spray without pushing cool water tones into orange.
Granite Bay is the standout astro location in the park. West-facing across Laguna Bay — the Milky Way core rises from the south and arcs over a clean horizon with minimal light contamination. The granite boulder foregrounds are distinctive enough that your images won't look like every other Sunshine Coast astro shot.
For sunset, the west-facing aspect gives you direct golden light on the boulders from roughly 90 minutes before sunset — significantly longer than east-facing spots. Warm granite tones against pastel sea makes this work for both single shots and blended exposures.
Insider edit: Blend a tracked sky exposure with a blue-hour foreground frame. A 20–30 minute gap between shots gives clean separation — noise-free stars over a sharp foreground.
Two natural rock pools that act as foreground mirrors at 0.8–1.1 m tide. On a calm morning with no swell, you get clean Milky Way or sunrise reflections across the pool surface. One of the most-photographed spots in the park — justifiably so.
Fairy Pools is not approved for commercial workshop use. Visit independently for full access. My guided sessions use nearby permitted zones including Boiling Pot and Granite Bay, which deliver comparable seascape quality within the permit boundary.
Insider edit: Dodge-burn the wet rocks around the pool — lift mid-tones on reflected surfaces, deepen shadow gaps between rocks for dimensional contrast.
Hell's Gates gives you the widest single-vantage panorama in Noosa National Park — 180 degrees sweeping from Alexandria Bay around to Laguna Bay. It's also one of the best photography locations in Noosa for telephoto work: low winter sun lights the basalt cliff faces side-on from around 7 am in June and July, revealing textures invisible at other times of year. The dramatic wave crashes through the rock channel at Hell's Gates are what earn it the name — plan around mid to high tide and a south-easterly swell for maximum impact.
Strong winds are common at the cliff edge, especially in winter. A solid tripod with a low centre of gravity is non-negotiable here. Secure your straps, keep a hand on the camera when gusts roll through, and build extra buffer time into your session for conditions to settle between frames.
Insider edit: Stitch a three-frame panorama then add subtle Dehaze on the sea spray — pulls atmospheric depth without destroying the haze that makes coastal shots feel real.
Protected from southerlies, which means calm water and reflective conditions far more reliably than exposed headland spots. Pandanus trunks and shoreline curves are natural leading lines that work in almost any light. Amber side-light at first light arrives earlier and softer here than at the headlands.
Arrive 20 minutes before sunrise to set your composition in the pre-dawn blue. Be ready for the colour shift when the first direct light catches the pandanus canopy — it's quick.
Insider edit: Lift mid-tones in the water using a luminance range mask — reveals submerged sand ripples and tidal textures that disappear in a flat edit.
Little Cove is arguably the most photogenic beach in Noosa for sunrise photography — a gentle curve of protected sand, pandanus silhouettes against pastel pre-dawn sky, and leading lines that almost compose themselves. It's a 10-minute walk from Hastings Street, which keeps it accessible but also means it gets busy on weekends. Arrive at least 30 minutes before first light on a weekday and you'll often have the cove entirely to yourself. In calm conditions at low tide, the wet sand reflects the horizon colours with near-mirror quality.
Little Cove sits outside my commercial permits and is best visited independently — I guide Noosa National Park sunrise shoots from Tea Tree Bay and Boiling Pot, which are within my approved zones. If you're shooting Little Cove solo, the soft-grad ND technique works beautifully here: two stops to balance the bright horizon glow against the naturally darker foreground sand, without killing the pastels that make this location so distinctive.
Insider edit: Split-toning with warm highlights and cool shadows for the classic pastel look. Keep it subtle — 10–15 hue shift maximum before it starts reading as processed.
Earns its place for versatility. West-facing for late-day light, elevated for clean horizons, and regularly visited by dolphins, sea eagles, and in summer, storm cells rolling in from the Coral Sea. The telephoto opportunities are genuinely unpredictable — that's a feature, not a problem. This is where I pivot the workshop when weather changes plans.
Summer lightning from November to February can be extraordinary from this vantage. If the storm is within a few kilometres, retreat to the tree line — not the spot to test weather sealing.
Insider edit: For lightning composites, blend the bolt frame into your base using Lighten blend mode in Photoshop — isolates the strike without affecting the rest of the frame.
The dark-sky jewel of Noosa National Park. A 25-minute walk from the car park — which is exactly why it stays dark. No artificial light for kilometres to the north and east. On a clear new-moon night in May or June, the Milky Way core rises directly over the bay with wide dunes and clean white sand for foreground. Some of the best accessible astro foreground on the Sunshine Coast.
The walk in at 2 am requires a good headlamp and confidence on the track. We finish our final workshop night shoot here before heading back for image critique at sunrise. It rewards the effort every time. Note: clothing-optional beach — irrelevant at 2 am in winter, but relevant if you're staying for a late sunrise session.
Insider edit: Colour range mask to isolate warm dune tones, push temperature slightly, keep the sky cool. The contrast between warm sand and cold purple-black sky is what makes these shots sing.
My Noosa National Park photography workshops operate under a commercial permit covering six approved locations: Boiling Pot, Tea Tree Bay, Granite Bay, Dolphin Point, Hell's Gates and Alexandria Bay. Fairy Pools and Little Cove are not part of my commercial permits — these are best visited independently, and I'm transparent about that in the guide above rather than pretending they're on the itinerary. All workshop sessions carry $20M public liability insurance and documented safety plans. The April 2026 intake is capped at a maximum of three participants.
Planning Your Shoot
Seasonal timing
- Autumn (Mar–May): warm tones, consistent colour, Milky Way season opens
- Winter (Jun–Aug): peak astro, cliff side-light, low humidity
- Spring (Sep–Nov): dramatic cloud, longer golden hours, swell picks up
- Summer (Dec–Feb): lightning season, early sunrises, busy trails
Essential apps
- PhotoPills — Milky Way arc planning, sunset/sunrise direction
- Windy — swell forecasting for Boiling Pot wave timing
- BOM — weather systems before committing to a drive
- Tides Near Me — tide height critical for Fairy Pools and Tea Tree Bay
Tide strategy
- Fairy Pools: 0.8–1.1 m for mirror-flat reflections
- Little Cove: low tide for maximum sand exposure
- Tea Tree Bay: incoming tide for dynamic water movement
- Granite Bay: exit before high tide — boulders become hazardous
Getting there
- Carpark: Park Road, Noosa Heads — opens 6 am
- From Brisbane: ~2 hours via M1 / Bruce Highway
- Sunrise shoots: park Hastings Street, 5-min walk to trailhead
- Trail: flat, well-maintained — headlamp essential before dawn
| Month | Sunrise | Milky Way | Best location |
|---|---|---|---|
| March–April | 6:00–6:30 am | Season beginning | Granite Bay, Fairy Pools |
| May–June | 6:30–7:00 am | Peak — core visible all night | Alexandria Bay, Granite Bay |
| July–August | 6:45–6:30 am | Strong — clear winter skies | Alexandria Bay, Hell's Gates |
| September–November | 5:45–5:20 am | Season winding down | Boiling Pot, Dolphin Point |
| December–February | 4:55–5:15 am | Off season — seascape and storm | Dolphin Point, Boiling Pot |
For Milky Way work at Alexandria Bay and Granite Bay, target new moon ±3 days. Use PhotoPills to confirm galactic core azimuth and elevation from each specific GPS point — the difference between a 10° and 30° elevation is significant for foreground composition.
FAQ
Shoot These Locations
With Me On Location
Three photographers maximum. Three days of guided field sessions at all six approved locations — sunrise seascapes, golden-hour headlands, and optional Milky Way — plus daily editing and critique sessions. Permits, transport planning and safety all handled.
17–19 April 2026 · You leave with finished files, not homework
Ultimate Guide to Sunshine Coast Photography Workshops (2025–2026)
Best Landscape Photography
Locations on the
Sunshine Coast
Landscape photography on the Sunshine Coast rewards the photographers who look beyond the obvious. The region runs from Caloundra in the south to the Noosa River in the north, and after running photography workshops and tours here since 2019, I'd argue it's one of the most diverse stretches of coastal Queensland for photographers. East-facing beaches for sunrise seascapes, hinterland ranges for elevated fog and foreground, and genuinely dark inland reservoirs for astrophotography and Milky Way photography — you can shoot three completely different disciplines within a relatively compact patch of south-east Queensland.
Most guides covering photography locations Sunshine Coast-wide serve up the same three or four spots that appear in every tourism brochure. What they skip is the tide strategy that separates a decent frame from a great one, the specific dark-sky windows at Borumba Dam that make it the best astrophotography location on the Sunshine Coast, and the access practicalities that matter if you're travelling from Brisbane or interstate. This guide covers seven locations across the region — verified GPS coordinates, honest seasonal notes, gear recommendations, and a straight take on what each spot actually delivers. I've shot all of them across multiple seasons.
The region divides naturally into three zones: the coastal strip running from Caloundra north to Noosa for seascape and beach photography on the Sunshine Coast; the hinterland ranges around the Glass House Mountains and Maleny for elevated landscape work; and the Imbil Valley where Borumba Dam sits as the area's premier dark-sky location for Milky Way photography. Each zone operates on different seasonal logic, mapped out in the planning section below.
If you're primarily interested in Noosa National Park specifically — the coastal trail from Boiling Pot to Alexandria Bay — I've written a dedicated guide covering all eight locations within the park. You'll find it linked in the related guides at the bottom of this page. The Noosa headland sits at the northern tip of the Sunshine Coast and is well worth the separate read.
Point Cartwright is the southern anchor of the Sunshine Coast and one of the most technically rich seascape locations in the region. The rock shelf east of the lighthouse gives you a layered composition — tide-pool foreground, mid-ground rock structure, horizon light — that works across a wide range of conditions. At low tide you can get out onto the platform itself; at mid to high tide the wave energy picks up and you're working with spray and surge. Both produce strong images, they just require different shutter choices.
The east-facing aspect means direct sunrise light from around 5:30 am through 7 am in summer, pushing toward 6:30 am in winter. The lighthouse sits at the eastern tip of the headland and gives you a secondary compositional anchor — it reads well framed to the left or right in a wide shot depending on where you position on the rock shelf. I use this location regularly in photography workshops because the access is easy, the light arrives reliably, and there are multiple distinct compositions within 100 metres of the carpark — useful when you need to move quickly as conditions change at sunrise. Sunshine Coast beach photography at Point Cartwright rewards preparation: check the swell forecast the night before, and arrive 20 minutes before first light to read the water before committing to a position.
Insider edit: Apply a radial graduated filter centred on the horizon — pull clarity and texture up in the midground rocks while keeping the sky clean. Stops the edit from looking flat across the whole frame.
Coolum Headland sits roughly mid-region and gives you two completely different shooting environments within a five-minute walk. The southern rock platform below the headland car park is a classic long-exposure location — layered rock shelves, consistent wave wash, and direct sunrise light hitting the rock face. Coolum beach photography on the platform works across a wide range of conditions: calm mornings produce mirror-flat water in the rock channels between exposures; southerly swell produces surge and spray that rewards faster shutter speeds and a polariser. Both produce strong images with different energy.
What most photographers miss at Coolum is the headland summit at sunset. It's not a seascape angle — it's elevated, looking west across the coastal plain toward the Glass House Mountains silhouetting against late colour. On days with stratocumulus cloud building inland in summer, this view is exceptional. The short walk up takes five minutes and is worth doing for that shot alone. In summer the lightning risk from Coolum's elevated position is real — track cells on the BOM radar and be off the summit before any storm closes to within 10 kilometres.
Insider edit: For long exposures at the platform, use a luminance range mask to selectively add texture to the midtone rocks without blowing the motion-blurred water. Keeps the frame from looking like a two-toned poster.
The Glass House Mountains are volcanic plugs — the remnant cores of ancient volcanoes that eroded away over 25–27 million years, leaving the hard rhyolite and trachyte peaks standing. Photographically, they're most powerful at distance, where telephoto compression stacks multiple peaks with atmospheric haze between them. Wild Horse Mountain Lookout, accessed via Johnston Road off Exit 171 of the Bruce Highway near Beerburrum, sits on the eastern side of the highway and gives you an elevated westward-facing view with multiple peaks in frame, ideal for late-afternoon side-light or foggy winter mornings.
The peaks themselves sit within the Glass House Mountains National Park, and access rules on individual summits vary — some are closed, some are culturally sensitive, and conditions can change. You don't need to be on them to make strong images — the distant compositions from surrounding farmland, especially looking north from around Beerburrum, have a spacious quality that the summit shots can't replicate. Winter fog in the valley between peaks is a seasonal gift: June and July mornings when a cold air mass settles overnight are worth an early alarm.
Insider edit: Embrace the atmospheric haze rather than fighting it — a subtle Dehaze increase reveals detail without removing the layered depth. Add a graduated cooling filter over the foreground to increase separation from warm peaks.
Borumba Dam is the best astrophotography location within easy reach of the Sunshine Coast — and if you're searching for genuine dark-sky Sunshine Coast astrophotography options, it's the answer. The reservoir sits roughly 90 kilometres inland from the coast near Imbil, high enough in the hinterland to escape the coastal light dome, with dark skies in most directions and a large reflective water surface for foreground interest. On a clear new-moon night in May or June, the Milky Way core rises over the eastern treeline and reflects across the calm lake surface — a composition that earns its reputation. This is the Sunshine Coast photography location that most local guides don't bother to include because it requires some effort to get to — which is exactly why the skies stay dark.
The dam wall and the eastern foreshore are the two most-used positions. The foreshore gives you more flexibility with framing and keeps you lower to the water for stronger reflections. The dam wall gives you elevated views and a clean man-made foreground element that works well for leading lines. Both positions sit within the SEQwater recreation area, which operates set opening hours and closes in the evening — if you're planning true night-sky work, treat Borumba as a camping-based shoot rather than a casual day trip. Check current SEQwater conditions before visiting, as the lake is occasionally affected by closures or safety notices. Bring a red-mode headlamp and more layers than you think you need — inland temperatures drop sharply after midnight in winter.
Insider edit: Blend a tracked sky exposure with a separate foreground frame shot at blue hour for a noise-free reflection. A 20–30 minute gap gives clean tonal separation — sharp stars over a foreground that still has usable detail and colour.
One Tree Hill is one of the most-photographed hinterland spots near Maleny — a single isolated tree on a ridgeline, with layered valleys falling away in all directions. It works as a sunrise fog location in winter when cold air settles into the valleys overnight, producing a sea of mist the tree floats above. For astrophotography on new-moon nights, the tree silhouetted against the Milky Way core makes a composition that's been done many times but remains effective for good reason. The minimalist geometry rewards a longer focal length — 50–85 mm isolates the tree against the fog or sky without the wide-angle distortion that flattens the layered valley depth.
The property is currently closed to the public — the owner has restricted access after the site became heavily trafficked. The composition is still achievable from the public road below the ridge, though framing is more constrained than from the property. Keep it roadside, respect the boundary, and be mindful of where you park. Mary Cairncross Scenic Reserve nearby provides a solid elevated alternative for hinterland photography if road-side shooting at One Tree Hill doesn't give you the angle you need.
Insider edit: Minimalist fog shots benefit from high contrast black and white — remove the distraction of colour and the layered fog tones do all the work. Convert in Lightroom with a lifted shadow point to maintain fog softness rather than pure black.
Kondalilla Falls drops 90 metres through subtropical rainforest in Kondalilla National Park near Montville. It's a completely different discipline from coastal or astro work — diffuse overhead canopy light, lush green foreground, and a sustained waterfall that produces genuine power at the main drop after significant rain. The 4.7 km circuit walk is moderate with over 300 stairs, and the falls are accessible year-round, though flow is significantly stronger from November through April following summer rainfall.
Overcast days are ideal here — the canopy already filters and softens light, and any direct sun creates harsh dappled patches that are difficult to balance in post. A cloudy day in the wet season after two or three days of rain is the target combination. Water flow at the main falls can be extraordinary in those conditions. Circular polariser is essential to manage reflections off wet surfaces and foliage.
Insider edit: Boost greens selectively in HSL rather than globally — pull yellow out of the green channel to push foliage toward a cleaner mid-green without making it look artificially teal.
Noosa National Park sits at the northern end of the Sunshine Coast and deserves its own dedicated guide — which I've written. The coastal trail connecting Boiling Pot Lookout, Tea Tree Bay, Granite Bay, Hell's Gates, Dolphin Point and Alexandria Bay covers sunrise seascapes, sunset headlands, and some of the most accessible astrophotography terrain on the Sunshine Coast, all linked by the headland trail network. Alexandria Bay in particular sits far enough from town lights to deliver Bortle 4–5 skies to the south and east from April through August.
My Noosa National Park photography workshops are built around the headland's most photogenic locations and current commercial access requirements. The April 2026 intake runs over three days with a maximum of three participants — sunrise, golden-hour headlands, and an optional Milky Way session depending on moon phase and conditions. All editing covered in daily critique sessions.
Full guide: See the 8 Best Photography Locations in Noosa National Park for GPS coordinates, tide notes and insider tips on all eight spots within the park.
Dylan Knight Photography runs photography courses, workshops and excursions on the Sunshine Coast, with permit requirements confirmed for each specific location before sessions run. Based on the Sunshine Coast, Dylan covers photography locations from Point Cartwright to Noosa and inland to Borumba Dam. All sessions carry $20M public liability insurance and documented safety plans aligned with Queensland operational requirements. Group sizes are kept deliberately small — a maximum of four participants on most workshops — to maintain a high instructor-to-participant ratio and minimise site impact.
Photography Courses & Workshops on the Sunshine Coast
Dylan Knight Photography runs small-group photography courses, workshops and tours across the Sunshine Coast covering seascape, landscape and astrophotography. All workshops are field-based — you're shooting, not sitting in a classroom. Maximum group sizes are kept deliberately small (four participants or fewer) so that instruction is genuinely personalised to your camera, your current skill level, and the conditions on the day.
Photography courses on the Sunshine Coast tend to fall into two categories: single-day or half-day sessions at a specific location (Point Cartwright at sunrise, for example), and multi-day immersive workshops that move across the region across several locations and light conditions. The multi-day format is significantly more effective for skill development — you get repetition across different scenarios, daily editing critique that accelerates your post-processing, and enough time to apply what you learned from day one during day two's shoot.
Guided sessions also extend into Noosa National Park where commercial access conditions apply. The April 2026 Noosa National Park workshop is the current intake; see the workshops overview page for the full schedule across the year.
All Dylan Knight Photography workshops include pre-trip location briefing, field instruction across multiple compositions, post-processing critique sessions, $20M public liability insurance, documented safety plans, and relevant approvals managed where required. You leave with edited files, not homework. Group sizes are capped to maintain a high instructor-to-photographer ratio — never more than four participants on Sunshine Coast sessions.
Planning Your Sunshine Coast Photography Shoot
Seasonal timing
- Autumn (Mar–May): warm coastal tones, Milky Way season opens at Borumba, consistent colour
- Winter (Jun–Aug): peak astro, Glass House fog, hinterland clarity, coolest temperatures
- Spring (Sep–Nov): swell picks up for seascapes, longer golden hours, wildflowers in hinterland
- Summer (Dec–Feb): lightning season, early sunrises, Kondalilla Falls at maximum flow
Essential apps
- PhotoPills — Milky Way arc and core planning, sun/moon direction and elevation
- Windy — swell and wind forecasting for seascape timing at Point Cartwright and Coolum
- BOM — weather systems before committing to a hinterland or inland drive
- Tides Near Me — tide height critical for rock shelf access at coastal locations
Logistics by zone
- Coastal south (Point Cartwright, Coolum): Caloundra/Coolum base, 1 hr from Brisbane
- Hinterland (Glass House, Maleny): Montville or Maleny base, allow 90 min from coast
- Astro (Borumba Dam): inland via Kenilworth or Imbil Rd; if shooting after dark, plan camping rather than relying on day-use access
- Noosa north: Hastings Street or Noosa Heads base, 2 hrs from Brisbane
Gear for the region
- Seascape: 14–24 mm, solid tripod, ND filter set, polariser, waterproof bag cover
- Astro: fast wide prime (f/2.8 or faster), star tracker, red-mode headlamp, warm layers
- Hinterland: 70–200 mm for Glass House; circular polariser essential at Kondalilla
- All locations: microfibre lens cloth — coastal spray and humidity affect all shoots
| Month | Sunrise (approx.) | Milky Way | Best location |
|---|---|---|---|
| March–April | 5:50–6:10 am | Season opening | Borumba Dam, Point Cartwright |
| May–June | 6:15–6:40 am | Peak — core visible all night | Borumba Dam, Noosa headland |
| July–August | 6:30–6:10 am | Strong — clear winter skies | Borumba Dam, Glass House Mountains fog |
| September–November | 5:50–5:20 am | Season winding down | Coolum Headland, Point Cartwright |
| December–February | 4:55–5:15 am | Off season | Kondalilla Falls, Point Cartwright, lightning from Coolum summit |
For Milky Way work at Borumba, target new moon ±3 days in May or June. Use PhotoPills to confirm galactic core azimuth and elevation from the eastern foreshore GPS point — the lake runs roughly north-south, so core position relative to the water surface changes significantly through the night. Arrive early to walk the foreshore and choose your foreground before it gets dark.
FAQ
Shoot These Locations
With Me On Location
Small-group workshops across the Sunshine Coast — coastal seascapes, hinterland landscapes, and Milky Way sessions at Borumba Dam. Field sessions, daily editing critique, permits and safety all handled. Maximum four participants.
Sunshine Coast · Queensland · You leave with finished files, not homework

A New Milestone: Becoming a Certified Professional Photographer
What It Means to Be a Certified Professional Photographer (CCP)
If you’ve been browsing photography services, you might have seen the phrase “Certified Professional Photographer” (CCP) and wondered what it actually means. I’m excited to share that I’ve earned my CCP accreditation through the Professional Photographers’ Association of Queensland (PPAQ)—and I’d love to explain why this is a big deal, both for me and for you!
1. What Is a CCP?
A CCP is a formal credential granted by the PPAQ to photographers who meet rigorous professional standards. That includes:
Demonstrating consistent technical skill and artistic quality across a portfolio.
Passing a review (often including a written component or practical evaluation) focused on photography principles and best practices.
Committing to ongoing professional development and ethical standards.
The end goal? Raising the bar for professional photography so that clients—like you—can book with confidence.
2. The Journey to Certification
Earning a CCP is not a casual checkbox. For me, the process involved:
Portfolio Submission: I selected a cross-section of my work showcasing technical accuracy (exposure, composition, lighting) and creativity.
Peer Assessment: Experienced professionals evaluated my submissions. Their feedback pushed me to refine my craft and maintain consistent, high-quality results.
Continued Education: CCP status isn’t “one and done.” I’ll be completing ongoing training to remain up-to-date with new techniques, technologies, and standards.
It was challenging, exciting, and incredibly rewarding. I came out of it a better photographer—and that’s something you’ll notice in every photo I deliver.
3. Why It Matters for You
A Certified Photographer has proven skills and a commitment to quality. Here’s what that means in practical terms:
Reliability & Consistency: You can expect professional results across all your photos, from family portraits to big events.
Attention to Detail: I don’t just “click and hope.” Techniques like lighting, posing, and post-processing follow proven standards.
Ethical Standards: As part of my certification, I’ve also pledged to follow industry best practices and maintain high professional ethics.
Ongoing Improvement: Through continued education and workshops, I’m always learning new ways to create stunning, timeless images for my clients.
4. Elevating Your Photography Experience
Having a CCP behind my name isn’t just about professional pride—it’s about giving you the best possible photography experience. Whether you’re booking me for a wedding, a portrait session, or a commercial project, I want you to feel confident knowing you’ve hired someone recognized for expertise and integrity.
5. Let’s Capture Your Story
Photographs are more than just pictures on a screen or prints on a wall; they’re the stories you’ll revisit and share for years to come. My goal as a CCP is to preserve these special moments in a way that truly reflects you—your personality, your passion, your brand, your family.
If you have any questions about my certification or want to chat about your upcoming photography needs, feel free to reach out! I’m here to help you capture life’s important milestones with professionalism, creativity, and the expertise that comes from being a Certified Professional Photographer (CCP).
Thank you for reading! Stay tuned for more updates, behind-the-scenes looks at my work, and helpful photography tips right here on the blog.
The Evolving Landscape of AI in Photography

AI Generated Image.
Introduction
Photography has traditionally been about capturing the world as it is—a real moment in time, preserved through the lens. Today, however, artificial intelligence (AI) is reshaping both the creative and ethical boundaries of this beloved art form. Tools like Adobe Lightroom and Photoshop now include powerful AI capabilities that make once-laborious editing tasks almost effortless. Meanwhile, AI-driven image generators such as Midjourney can produce hyper-realistic images from just a few words typed into a prompt.
With these cutting-edge technologies come critical questions around authenticity, ethics, and the future role of photographers. This article delves into how AI is revolutionising photography, the importance of transparency and ethical practice, and how photographers—whether hobbyists or professionals—can responsibly adapt.
1. Why AI and Photography Matter Now
The integration of AI into photography has gained urgency in recent years for several reasons:
Technological Advancements: Modern AI tools, including Adobe’s Generative Fill and Midjourney, have turned hours of manual editing into tasks completed at the click of a button. This accessibility and speed are altering how images are created and perceived.
Ethical Implications: As AI-generated images grow increasingly realistic, some individuals use them to misrepresent experiences. For instance, a user could claim they travelled abroad to capture a once-in-a-lifetime shot, even if the image was generated entirely by AI.
Broader Impact: AI is no longer exclusive to tech giants or research labs. Its wide availability puts questions of authenticity and responsibility front and centre, not just for professionals but also for everyday enthusiasts.
According to a recent report by the Poynter Institute, many viewers online struggle to distinguish AI-generated images from authentic photographs, highlighting the risk of widespread misinformation.
2. AI in the Photography Workflow
AI has found its way into nearly every stage of the photography process, transforming how images are both created and edited:
Image Generation: Platforms like Midjourney and DALL·E allow users to produce detailed, often breathtaking images based on text prompts alone.
Automatic Enhancements: Adobe Lightroom and Photoshop now use AI for selective editing, such as automatic sky replacements or noise reduction, drastically cutting down on manual retouching time.
Categorisation & Facial Recognition: Most smartphone cameras and editing suites rely on AI to classify photos, identify faces, and tag images, streamlining organisation for both casual and professional use.
Furthermore, some e-commerce platforms have begun using AI to generate product images entirely from descriptive text, bypassing the need for traditional photoshoots. This trend exemplifies how AI can replace certain facets of commercial photography.
3. Authenticity: A Blurred Line
One of the biggest concerns with AI in photography is the potential for misrepresentation. For example, AI-generated wildlife images sometimes circulate on social media, racking up likes and shares before people notice artificial distortions. In one case, a seemingly believable but AI-created moose image featured multiple antlers and limbs—yet gained immense traction before its origins were questioned.
This issue is not altogether new: professional photographers have long used advanced techniques to blend multiple exposures for surreal landscapes. However, AI has made such manipulations accessible to nearly everyone, often without viewers noticing. This shift raises questions about what constitutes a “real photo” and whether the public can still trust visual media at face value.
4. Ethical Considerations in AI-Driven Photography
When it comes to responsible AI usage, ethical principles such as honesty, transparency, and creative integrity remain paramount:
Disclosure: The National Press Photographers Association (NPPA) Code of Ethics calls for clear disclosure when images are manipulated in meaningful ways. Extending this guideline to AI-generated or heavily AI-edited images helps maintain credibility.
Competition Standards: Competitions like the World Press Photo Awards often require RAW files to confirm the authenticity of an image. Although these rules focus primarily on conventional post-processing, they could be adapted to verify the level of AI intervention.
Art vs. Reality: For artistic photography, manipulations may be accepted as creative expression. Yet, misrepresenting an AI-generated scene as a real experience is widely viewed as unethical within the community.
These evolving norms underscore the importance of clarity. If you create a pure AI image, labelling it honestly protects both your integrity and the trust of your audience.
5. Professional and Commercial Impact
AI holds a dual role for professional photographers—it can bolster their efficiency, while also posing threats to certain niches:
Efficiency Gains: Features like “Generative Fill” in Photoshop or automated sky selection reduce manual labour, freeing photographers to focus on creative decisions rather than time-consuming technical tasks.
Risk of Replacement: Product photography is already seeing AI-driven alternatives, where businesses can generate catalogue images simply by typing a description. This trend may shrink some job markets while expanding others.
Competitive Edge: Photographers who embrace AI can often create more polished work at a faster pace, potentially elevating their service offerings and keeping their businesses relevant.
6. Expanding Creative Horizons
Despite concerns about authenticity, AI also paves the way for unprecedented creative opportunities:
Unlimited Exploration: Photographers can test ideas or scenes that would be impossible or too costly to capture in reality. AI can quickly mock up creative concepts, serving as an inspirational tool or mood board.
Levelling the Field: Accessible AI editing features help novices approach a professional look without years of training in advanced software. This advantage can widen the pool of creative voices.
Value of Experience: For many enthusiasts and pros, the real joy of photography lies in the adventure—travelling to captivating locations, feeling the excitement of capturing a fleeting moment, and sharing that genuine story. AI, no matter how powerful, cannot replicate that experience.
7. Maintaining Transparency and Trust
Balancing innovation with integrity calls for honest communication:
Labelling Practices: Social media posts or portfolios featuring fully AI-generated images might include disclaimers like “Created using Midjourney,” helping viewers understand the distinction.
Proof of Authenticity: In high-stakes contests, photo editors or judges often require RAW files to confirm the legitimacy of a submission. Several organisations are exploring blockchain-based or metadata-centric methods to track digital edits.
Community Guidelines: Many photography groups have started incorporating guidelines about disclosing AI use to maintain trust within their membership.
8. The Next Decade in AI Photography
AI’s capabilities advance exponentially, not just incrementally. Over the next five to ten years:
Near-Instant Editing: One-click AI “presets” could apply complex transformations in seconds, granting photographers new levels of creative control.
Regulatory Developments: As AI becomes ubiquitous, we may see new guidelines or regulations—particularly in competitive or commercial environments—around image authenticity.
Enhanced Collaboration: AI might serve as a co-creator for photographers, brainstorming ideas, planning shots, or automatically curating images for different audiences.
9. Staying Informed and Adapting
As the landscape shifts:
Follow Industry News: Track updates from reputable sources (e.g., Poynter Institute, Adobe, major camera manufacturers) to stay aware of new tools and ethical debates.
Engage with the Community: Participate in forums, workshops, and online groups that encourage open discussion about AI’s impact on photography.
Continuing Education: Attend webinars, online courses, and conferences focusing on emerging AI technologies, so you remain competitive and capable in your field.
Uphold Integrity: If your work involves AI, disclose it. This fosters trust, clarifies expectations, and educates clients or audiences who might be unfamiliar with the technology.
Conclusion
AI technology undoubtedly enriches the possibilities of modern photography, making editing faster and more powerful, and even enabling image creation without a camera. Yet these benefits come with significant ethical responsibilities. Misrepresentation—claiming an AI-crafted image as a genuine photo—undermines trust and complicates the shared understanding of what photography is.
By embracing transparency, exploring the full range of AI’s creative potential, and maintaining a steadfast respect for authentic storytelling, photographers can harness these tools without abandoning the core values that make the art form both timeless and meaningful. After all, no algorithm can replicate the profound human connection found in witnessing and capturing a moment as it unfolds in real life.
Further Reading
National Press Photographers Association (NPPA) Code of Ethics: https://nppa.org/code-ethics
World Press Photo Foundation: https://www.worldpressphoto.org/
Adobe Firefly & Generative AI: https://www.adobe.com/sensei/generative-ai/firefly.html
Midjourney: https://www.midjourney.com/
Poynter Institute on AI-Generated Misinformation: https://www.poynter.org/ethics-trust/
By staying curious and considerate, photographers can evolve with AI technology while safeguarding the honesty and exhilaration at the heart of a truly remarkable shot.
Top 5 Nikon Lenses for 2024: Enhance Your Photography Game
Whether you're an amateur photographer or a seasoned professional, having the right lens can make all the difference in capturing breathtaking images. In this article, we will explore the top five Nikon lenses for 2024, each offering unique features to elevate your landscape photography. Let's dive into the details.
1. Nikon AF-S NIKKOR 14-24mm f/2.8G ED
Best Overall for Landscape Photography
The Nikon AF-S NIKKOR 14-24mm is acclaimed as the best overall lens for landscape photography. Its ultra-wide-angle zoom and fast f/2.8 aperture are perfect for capturing expansive scenes with stunning clarity. This lens offers exceptional optics with edge-to-edge sharpness and minimal distortion, making it a top choice for professional landscape photographers.
Personal Insight: This lens has been on every single trip and has captured the majority of my portfolio photos, including nearly all of my astrophotography images. The 14mm wide-angle capability of this lens aligns perfectly with my style, which focuses on capturing textures and interesting foreground elements that guide the viewer's eye into the scene.
Key Features:
Focal Length: 14-24mm
Maximum Aperture: f/2.8
Superior Optical Performance
Robust Build Quality


2. Nikon AF-S DX NIKKOR 35mm f/1.8G
Best for Versatility
The compact and lightweight Nikon AF-S DX NIKKOR 35mm f/1.8G excels in both landscape and general photography. Its fast f/1.8 aperture performs superbly in low-light conditions and allows for beautiful background blur, making it an excellent choice for photographers on the move.
Key Features:
Focal Length: 35mm
Maximum Aperture: f/1.8
Compact and Lightweight
Excellent Low-Light Performance

3. Nikon AF-S FX NIKKOR 20mm f/1.8G ED
Best Wide-Angle Lens
Ideal for those who prefer a prime lens, the Nikon AF-S FX NIKKOR 20mm f/1.8G ED offers a broad field of view, perfect for capturing sweeping landscapes. Its wide f/1.8 aperture allows excellent control over depth of field and performs well in various lighting conditions.
Key Features:
Focal Length: 20mm
Maximum Aperture: f/1.8
Wide Field of View
High-Quality Optics

4. Nikon AF-S NIKKOR 24mm f/1.8G ED
Best Lightweight Option
Known for its precision and compact design, the Nikon AF-S NIKKOR 24mm f/1.8G ED provides sharp images with minimal chromatic aberration. This lens is a top choice for photographers who need a high-quality, portable option.
Key Features:
Focal Length: 24mm
Maximum Aperture: f/1.8
Lightweight and Portable
Excellent Image Quality

5. Nikon AF-S NIKKOR 70-200mm F/2.8E FL ED VR
Best for Versatility in Professional Photography
The Nikon AF-S NIKKOR 70-200mm F/2.8E FL ED VR is a powerhouse for low-light, sports, wildlife, concerts, weddings, portraits, and everyday shooting. This lens is a dream for professionals and hobbyists alike, with significant improvements in optical formula, handling, weather sealing, and VR image stabilization.
Personal Experience: This lens has refined my landscape photography by isolating subjects and eliminating distractions, focusing on elements such as mountains, intriguing trees, or distinctive rock formations. It has also been my gateway into wildlife photography.
Key Features:
Focal Length: 70-200mm
Maximum Aperture: f/2.8
Advanced VR Image Stabilization: Up to 4 stops
Exceptional Optical Performance
Durable Build

Comparative Analysis
| Lens | Focal Length | Max Aperture | Weight | Best For |
|---|---|---|---|---|
| 14-24mm f/2.8G ED | 14-24mm | f/2.8 | 1000g | Overall Landscape |
| 35mm f/1.8G | 35mm | f/1.8 | 200g | Versatility |
| 20mm f/1.8G ED | 20mm | f/1.8 | 355g | Wide-Angle |
| 24mm f/1.8G ED | 24mm | f/1.8 | 355g | Lightweight |
| 10-24mm f/3.5-4.5G ED | 10-24mm | f/3.5-4.5 | 460g | DX Format Cameras |
Enhance Your Gear with Exclusive Discount
Upgrade your photography equipment with Nikon and enjoy a special 10% discount. Use the code DYLAN10 on the Nikon Australia website. Terms apply.
The Essential L-Bracket: Why Every Photographer Needs One
If you've ever been caught up in the exhilarating race against a setting sun or changing landscape, you'll know how crucial it is to have the right tools on hand. The tool I want to highlight today is the L-Bracket, a simple piece of equipment that, once discovered, can become as vital to your photography kit as the lens itself. Especially for beginners who may not be familiar with it, let's start by demystifying the L-Bracket and why it's such a game-changer.

Picture this: You've got a camera set up on a standard tripod without an L-Bracket and one equipped with an L-Bracket, side by side. The L-Bracket setup shines with its ease and speed of changing from landscape to portrait orientation, a godsend when seconds count in capturing the perfect light.
I remember vividly two years into my own photography journey when I first used an L-Bracket. My immediate reaction was, "Why didn't I do this sooner?" I had spent countless hours struggling with restrictive standard tripod ball heads, wrestling for the perfect shot instead of focusing on composition and timing. The L-Bracket became a liberator, allowing me to concentrate on what mattered most - the art of photography.
The L-Bracket, typically made from a durable aluminium alloy, is a light addition to your setup that can revolutionise your shooting experience. Designed with a convex edge, it ensures the camera won't twist or shift during use, while the safety stop screws add another layer of security during installation or removal. The bracket features a broad gap on one side, allowing unrestricted access to the camera's ports. Its skeleton-style design minimises weight while maximising durability, and it's compatible with both Arca and Really Right Stuff style clamps, making the switch between horizontal and vertical orientations a breeze.
Now, let me break down some key benefits that L-Brackets offer.
1. Speed
The L-Bracket is an absolute lifesaver when you're on the move. I'm not the type to stand in one spot, waiting for the perfect light or shot. I love exploring the area, hunting for potential compositions before the peak colour or light. This is where the L-Bracket shines—facilitating swift change between landscape and portrait orientations, helping me capture as many frames as possible.

2. Easy Orientation Change
It's crucial to get the orientation right in the field. Cropping a landscape shot into a portrait can mean losing half the pixels and image quality. The L-Bracket ensures smooth transitioning between orientations and eliminates interference between the tripod and ball head.

3. No Tripod and Ball Head Interference
Have you ever struggled to frame a portrait shot because your camera hits the tripod, or you've had to move the entire tripod to centre your subject? The L-Bracket eliminates these issues, allowing the camera to sit on top, making shooting easier and maintaining centre stability on the tripod.

4. which L-Bracket to choose?
While many brands offer specific models for your camera, universal ones can work just as well. They allow change between orientations and offer cutouts for all the camera’s ports. I've personally been using the Sunwayfoto PNL-D850 Custom L Bracket for Nikon D850/D810 for the last 4 years and it hasn't let me down. Its durability and compatibility with Arca-type and Really Right Stuff lever clamps make it a reliable choice.

Conclusion
To wrap it up, investing in an L-Bracket can be a game-changer for your photography. It can save you precious time, reduce frustration, and allow you to focus on what truly matters—creating beautiful images. So, if you haven’t already, give the L-Bracket a go. You won't look back!

Feedback
I'm eager to hear about your experiences with L-Brackets, and any tips you have for using them. Feel free to share your thoughts in the comments. Let's keep learning and growing together on this exciting photography journey!

Capture Kiama’s Natural Wonders: A Photographer’s Guide to Bombo Quarry, Cathedral Rocks, and Minnamurra
Discover how to photograph Bombo Quarry, Cathedral Rocks, and Minnamurra in Kiama, NSW. Get expert tips, gear advice, and workshop-ready insights from a landscape and astrophotographer.
Updated: June 18, 2025
Location: Kiama, NSW
As of 11:12 AM AEST on Wednesday, June 18, 2025, the days are getting longer, and the golden hours are stretching—perfect conditions for photographers heading to Kiama. With summer just around the corner, now is the best time to plan your next coastal shoot.
Kiama, just 90km south of Sydney, is a magnet for landscape and astrophotographers. From dramatic basalt cliffs to tidal estuaries and dark skies perfect for Milky Way photography, this coastal gem offers an incredible range of photo opportunities. In this guide, I’ll walk you through how to photograph three of Kiama’s most iconic spots—Bombo Quarry, Cathedral Rocks, and Minnamurra—including the best times to shoot, ideal gear, and insights gained from running workshops on location.
Why Kiama Is a Must-Shoot Location
Kiama challenges and rewards photographers. You’ll learn how light, tides, and weather shape every shot—and how to adapt your camera settings to suit. Whether you're into long exposure seascapes or astrophotography compositions, Kiama offers professional-grade scenes with minimal effort once you know where to look.
1. Bombo Quarry – For Drama and Depth

Bombo Quarry’s jagged basalt columns and wild coastal energy make it one of Australia’s most compelling seascape and night photography locations.
Best times to shoot:
Golden Hour: Soft light enhances texture and shape.
Clear winter nights: Perfect for Milky Way alignment over the quarry.
Gear & tips:
Tripod: Carbon-fibre preferred—sturdy in wind and salt spray.
6-stop ND filter: Slows shutter speed for motion blur in waves.
Wide-angle lens: Essential to capture scale and depth.
Shutter speed: 1–2s for texture, 10s+ for a misty water effect.
💬 Workshop Moment: One student captured the Milky Way arching over crashing waves—combining a tracked sky with a static foreground using exposure stacking. A wall-worthy print, built from a 5-minute on-site demo.
→ Join a Bombo workshop and shoot it like a pro.
2. Cathedral Rocks – Foregrounds for Astro & Seascape

These towering volcanic formations create unforgettable silhouettes against colourful skies—or anchor Milky Way compositions with bold geometry.
Best times to shoot:
Sunrise/Sunset: Low light adds contrast and drama.
Moonless nights: Ideal for tracked or stacked astrophotography.
Gear & tips:
Tripod + Graduated ND filter: Balance the bright sky and dark rocks.
Wide-angle lens: Needed to frame both stars and foreground.
Shutter speed: 0.5s–1s for water texture, 20s+ for ethereal blends.
💬 Workshop Moment: A client submitted their tracked Milky Way shot to an international competition—and became a finalist. Their secret? Careful planning with the PhotoPills app, a tip we covered in-session.
→ See the Kiama Coastline Multiday Workshop 2026
3. Minnamurra – Tranquil Estuary Scenes

Where river meets ocean, Minnamurra offers stillness, soft gradients, and lush vegetation. It’s ideal for long exposures and telephoto compositions.
Best times to shoot:
Winter mornings: Expect soft fog and magical reflections.
Late afternoons: Rich golden tones and long shadows.
Gear & tips:
6-stop ND + polariser filters: Slow the shutter and remove glare.
Telephoto lens: Perfect for isolating details.
Shutter speed: 1–4s for painterly water and tidal motion.
💬 Workshop Moment: One beginner created an image that resembled an oil painting—fog, clean water, and soft light—all from a pre-dawn shoot after a quick rundown on metering and shutter control.
→ Grab my Sescape Cheat Sheet for full estuary setup and editing tips.
What’s Next?
Mastering Kiama’s landscape photography is about more than gear. It’s about timing, composition, and knowing how to respond to light and conditions. These locations are not just photogenic—they’re where photographers level up.
“You don’t make a photograph just with a camera. You bring to the act of photography all the pictures you’ve seen, the books you’ve read, the people you’ve loved.”
— Ansel Adams
Take Action
Ready to take your shots from “nice” to “next level”? Here’s how:
📸 Join a Workshop: Hands-on training at Bombo, Cathedral Rocks, or Minnamurra.
📘 Download My eBooks: Proven techniques for long exposures, seascapes, and Milky Way mastery.
📺 Subscribe on YouTube: Free tutorials, gear reviews, and behind-the-scenes edits.
✉️ Join My Mailing List: Get exclusive tips, early workshop access, and gear discounts.
Got any questions or want to follow along?
Contact me here or message me on Instagram: @knightysphotography


10 Compositional Tips for Landscape Photography
1. Rule of thirds
The rule of thirds is a fundamental principle of composition that suggests that an image is most aesthetically pleasing when its subject is placed along one of the lines that divide the image into thirds, horizontally or vertically. This rule is based on the idea that the human eye is naturally drawn to points of interest that are located at the intersections of these lines.
To use the rule of thirds in your compositions, you can divide your frame into a 3x3 grid by drawing two equally spaced horizontal lines and two equally spaced vertical lines. Then, you can place the main subject of your image along one of these lines or at one of the intersections. For example, you might place the horizon of a landscape along the top or bottom third of the frame, or you might place the main subject of a portrait along one of the vertical thirds.
By using the rule of thirds in your compositions, you can create balanced and visually appealing images that draw the viewer's attention to the main subject and provide a sense of structure and organisation.
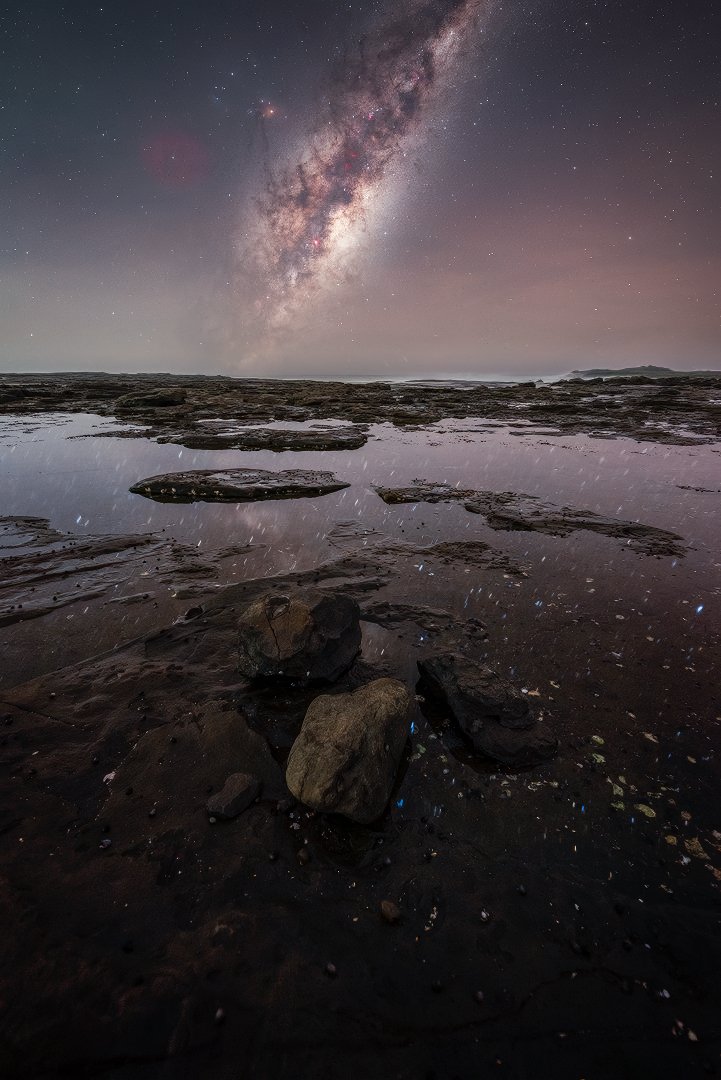
2. Leading lines
Lines are an important element in photography that can be used to add depth and interest to an image. Lines that lead the eye through the image, such as roads, streams, or fences, can help to create a sense of movement and guide the viewer's gaze through the frame. These lines can be used to direct the viewer's attention to the main subject or to create a sense of depth and perspective in the photograph.
There are many different types of lines that can be used in photography, and you can be creative in the way you use them to add interest to your images. For example, you might use the structure of a rock or the shape of different stones to create lines and patterns in the foreground of your image. Similarly, you might use lines in the sand, broken branches, or other elements to create a sense of texture and depth. By incorporating lines into your compositions, you can add depth and interest to your images and guide the viewer's gaze through the scene.

3. Foreground interest
Including elements in the foreground of a landscape photograph can be an effective way to add depth and dimension to the image. By placing objects in the foreground, you can create a sense of perspective and distance, making the background elements appear farther away and giving the image a sense of depth.
There are many different types of elements that you can include in the foreground of your landscape photographs, such as rocks, plants, or other natural features. For example, you might include different textures found in the foreground, such as leaves, rocks, or flowing water, to add interest and depth to the image. You can also use the elements in the foreground to create a sense of movement and guide the viewer's gaze through the scene. By carefully considering the elements in the foreground of your landscape photographs, you can create more dynamic and interesting images that capture the viewer's attention.
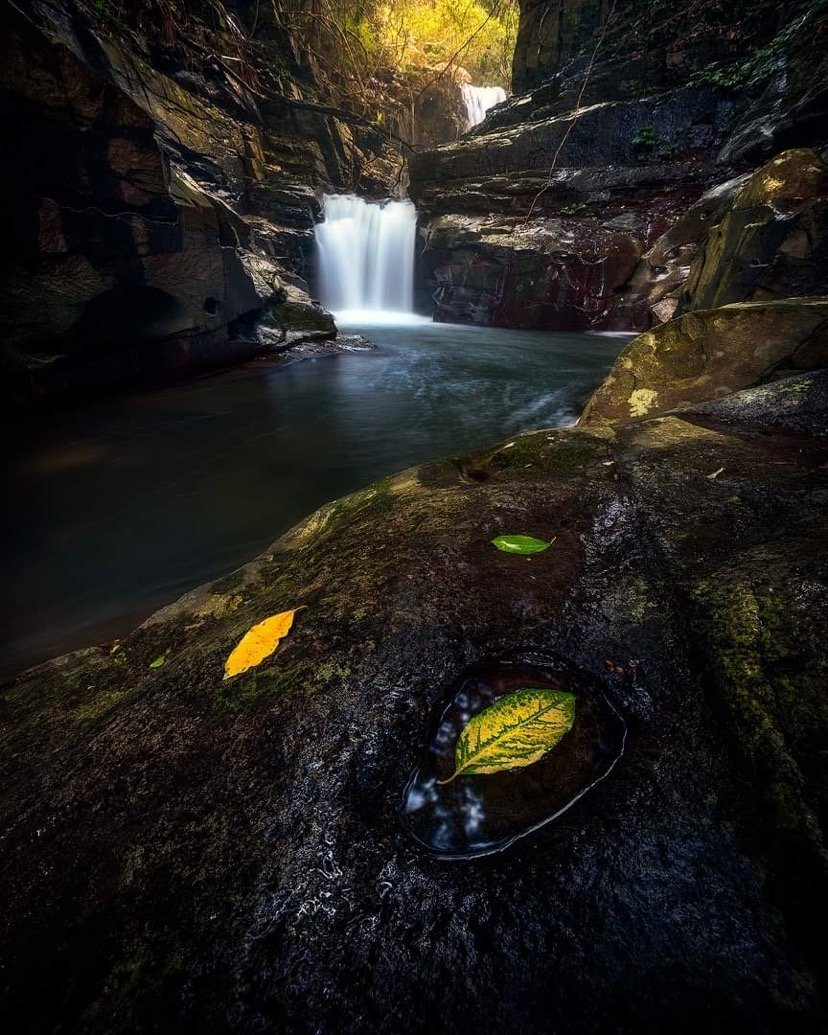
4. Balance
A balanced composition is one in which the elements of the image are evenly distributed and create a sense of harmony. This can be achieved in a variety of ways, such as by placing the main subject in the centre of the frame or by using elements on either side of the frame to balance the composition.
One way to create a balanced composition is to place the main subject in the centre of the frame, using the surrounding elements to create symmetry and balance. For example, you might photograph a lone tree in the centre of the frame, with a dramatic sky above and a clear, open foreground below. This simple and balanced composition can create a sense of harmony and draw the viewer's attention to the main subject.
Alternatively, you can use elements on either side of the frame to balance the composition and create a sense of harmony. For example, you might photograph a landscape with a dramatic mountain on one side of the frame and a calm lake on the other, using the contrasting elements to create balance and interest in the image. By considering balance in your compositions, you can create harmonious and aesthetically pleasing images that engage the viewer.
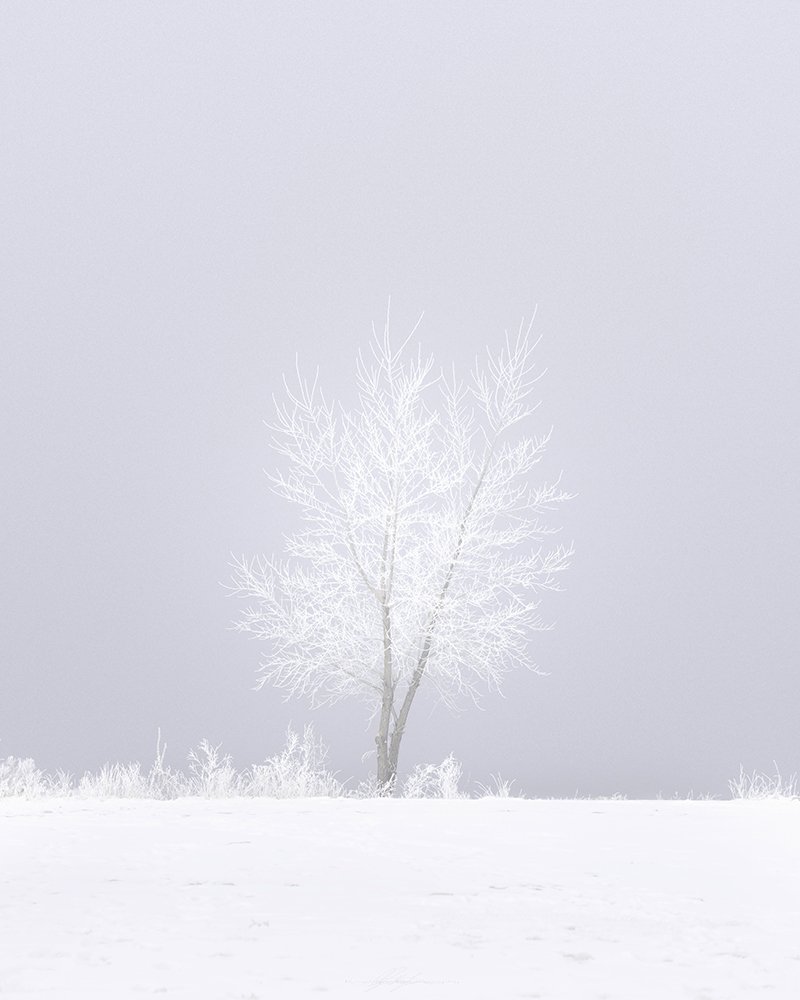
5. Perspective
The angle from which a photograph is taken can have a significant impact on its overall composition and the way it is perceived by the viewer. Changing the angle of the camera can alter the perspective and give a different sense of scale and proportion to the subjects in the photograph. For example, taking a photograph from a high angle can give a sense of grandeur and sweep, making the subjects appear smaller and the surroundings seem larger. On the other hand, a photograph taken from a low angle can make the subject appear larger and more imposing, giving the image a sense of power and dominance.
The angle of the photograph can also be used to highlight specific details or textures. For example, if you are photographing a wave coming in over some rocks, a low angle might allow you to capture the sweeping motion of the wave and the texture of the rocks. Alternatively, if you are photographing a mountain, a high angle might allow you to capture the vast details and make the mountain appear larger and more prominent. By considering the angle at which you take a photograph, you can add depth and interest to your images and control the way the subject is perceived.
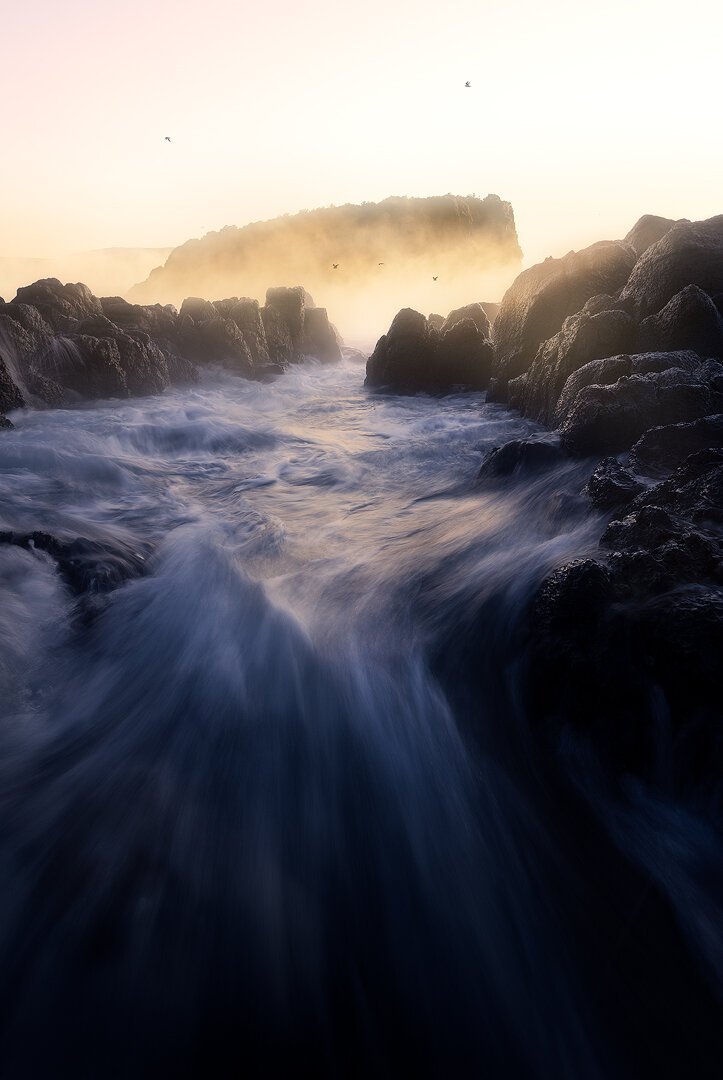
6. Framing
Using elements within the scene to frame the main subject can be an effective technique for adding depth and interest to a photograph. This can be done by positioning the frame around the main subject, or by using the frame to draw the viewer's eye to the main subject. For example, you might use trees or arches to frame the main subject, or you might use the edge of a doorway or window shape to create a natural frame.
Using a longer focal length can also help to frame the image and flatten the background, making it appear closer and more appealing. A longer focal length has a narrower field of view and can create a shallower depth of field, which can help to draw attention to the main subject and blur the background. This can be especially effective when shooting mountains or other close-up subjects, as it can help to create a sense of intimacy and focus. By using elements in the scene to frame the main subject, you can add depth and interest to your images and draw the viewer's eye to the most important elements of the scene.
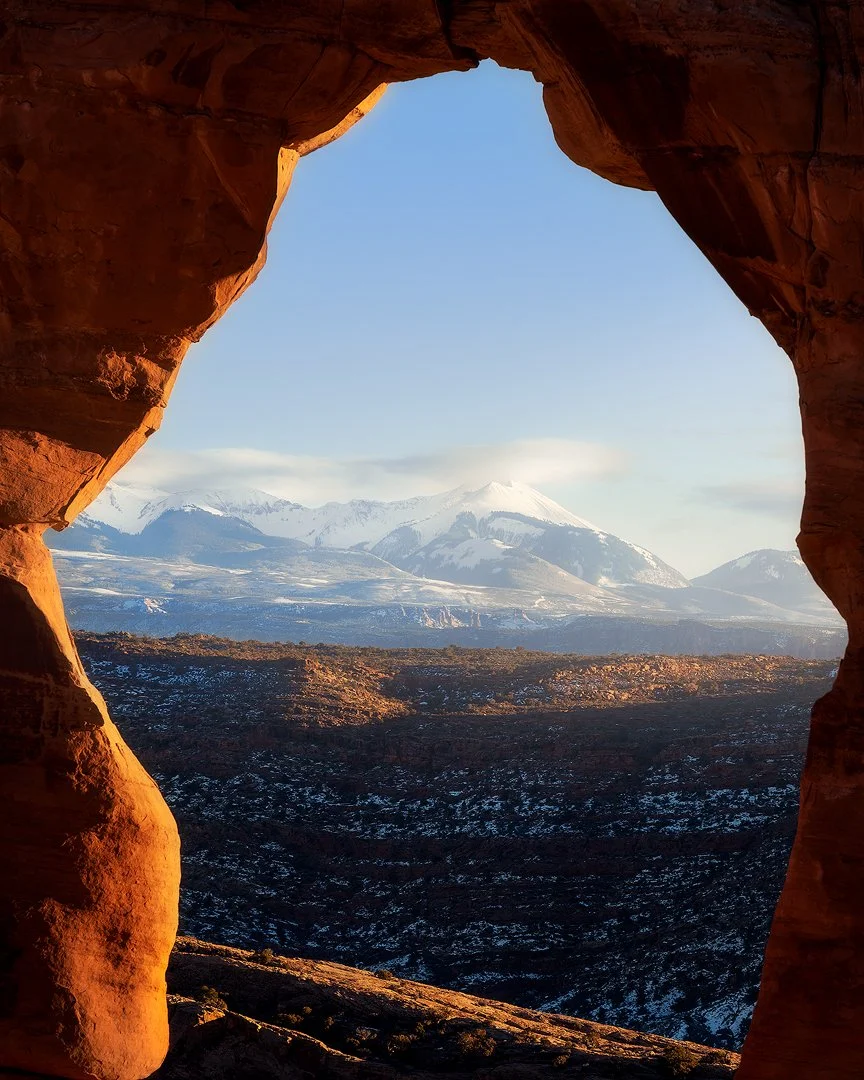
7. Negative space
Negative space refers to the area around and between the main subjects in an image. Including negative space in a photograph can help to emphasise the main subject and create a sense of balance in the composition. Negative space can be used to create a sense of openness and emptiness, allowing the viewer's eye to rest and focus on the main subject.
For example, you might photograph your main subject against a blank sky for the background to create a sense of negative space and emphasise the subject. This can be especially effective when the main subject is a small or detailed object, as the negative space can help to draw attention to the subject and create a sense of balance in the image. Alternatively, you might use negative space to create a sense of isolation or loneliness, depending on the mood and message of your photograph. By including negative space in your compositions, you can create dynamic and interesting images that emphasise the main subject and create a sense of balance.

8. Simplicity
When composing a photograph, it is often best to keep things simple and avoid cluttering the image with too many competing elements. A photograph with a simple, uncluttered composition can be more effective and easier for the viewer to understand and engage with. In contrast, an image with too many competing elements can be overwhelming and confusing, making it difficult for the viewer to focus on the main subject.
For example, when photographing a mountain scene, you might choose to focus on a lone jagged peak, rather than including multiple peaks in the frame. This simple composition can create a strong and powerful image that draws the viewer's attention to the peak and avoids distractions. Similarly, when photographing other subjects, you might choose to eliminate unnecessary elements and focus on the main subject to create a more effective and impactful photograph. By keeping your compositions simple and uncluttered, you can create powerful and engaging images that communicate your message effectively.
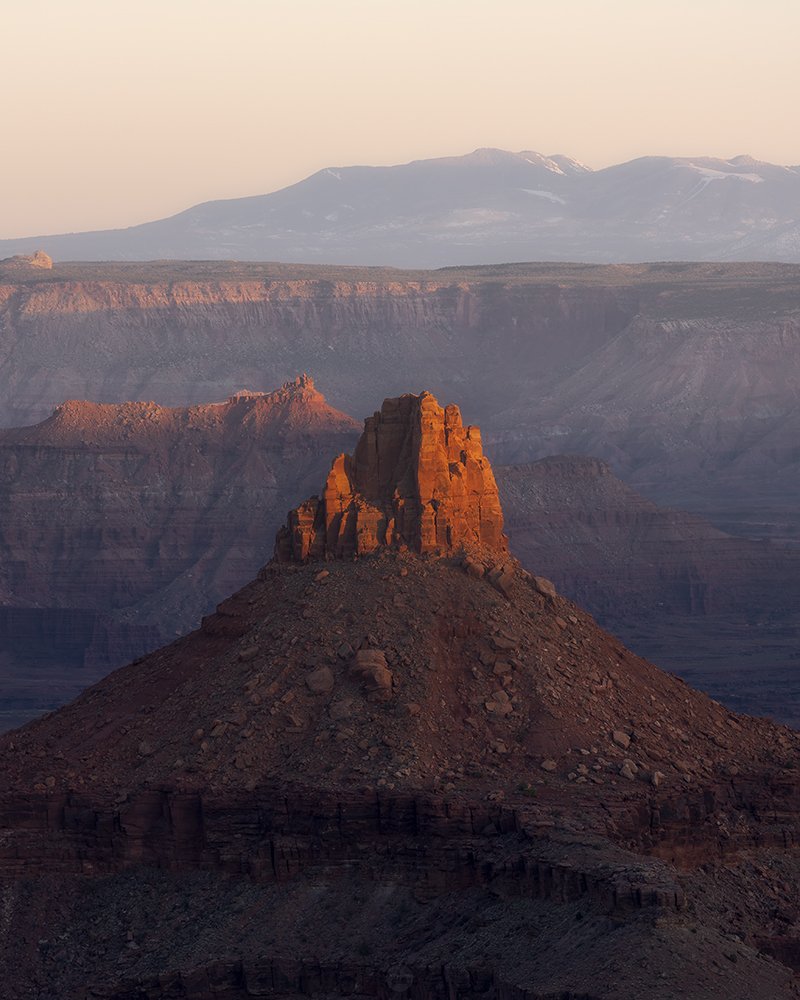
9. Cropping
Cropping is an important technique in photography that involves trimming or cutting away parts of an image to change its composition. Careful cropping can help to improve the overall balance and focus of a photograph by eliminating distractions and highlighting the main subject. For example, if you are photographing a tree, you might crop out the branches to focus on the leaves and flowers, or you might crop out distracting elements in the background to create a cleaner and more cohesive image.
Cropping can also be used to adjust the aspect ratio of an image, which is the relationship between its width and height. By cropping an image to a specific aspect ratio, such as a traditional 4:3 or a modern 16:9, you can produce a more visually appealing photograph that conforms to standard print or display sizes. In this way, cropping can be a powerful tool for creating superior images that are well-composed and visually appealing.
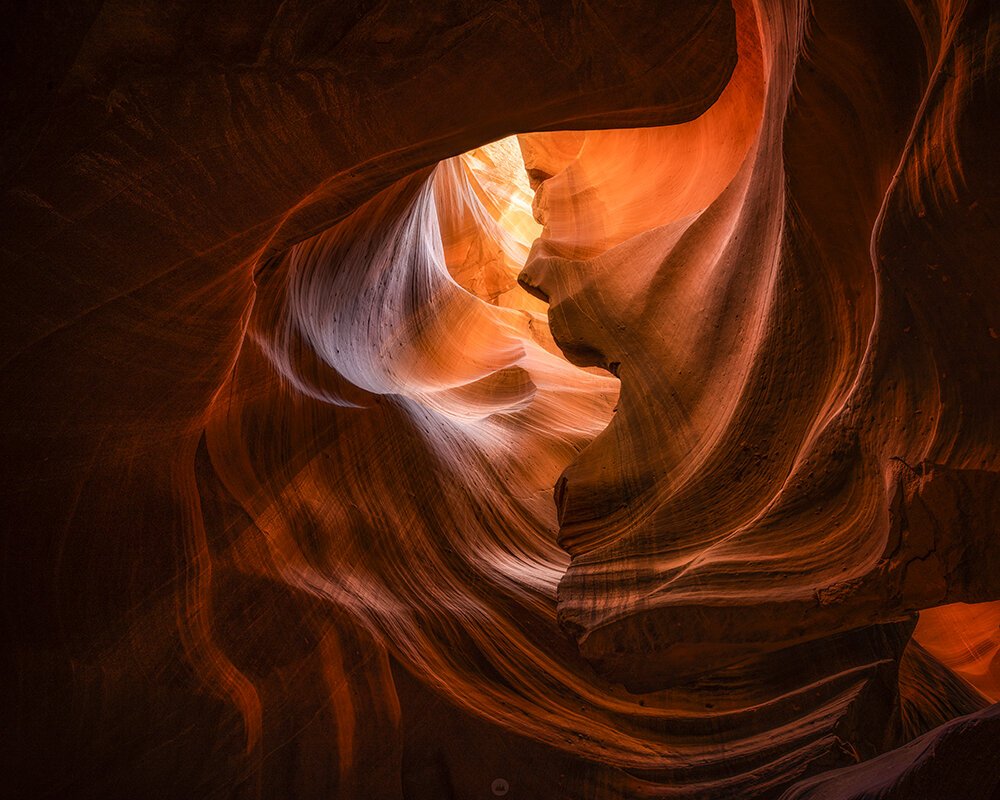
10. Depth of field
A shallow depth of field refers to a photograph in which only a small area appears to be in focus, while the rest of the image appears blurry. This technique can be used to draw attention to the main subject of the photograph and create a sense of depth. For example, if you are photographing a flower, using a shallow depth of field can help to blur the background and make the flower stand out as the primary focus of the image. On the other hand, if you are photographing a landscape, you might want to use a deep depth of field to keep everything in the image in focus, from the foreground to the background. By understanding how to control the depth of field in your photographs, you can effectively highlight the most important elements of your scene and create a sense of depth and dimension.

11. Bonus Tip
Pay attention to the light and how it changes from different times to different conditions. Light is one of the most important elements in photography, and it can greatly affect the mood and feel of a photograph. In landscape photography, you can use the light to highlight certain elements in the scene and create a sense of drama or mood. For example, you might use backlighting to create a silhouette effect, or you might use soft, diffused light to create a dreamy, ethereal feel. Paying attention to the direction and quality of the light can help you create more dynamic and interesting landscape photographs.

Conclusion
There are several important fundamentals to consider when composing a landscape photograph. These include the rule of thirds, leading lines, foreground interest, balance, perspective, framing, negative space, simplicity, cropping, depth of field, and the quality of light. By applying these principles, you can create more dynamic, interesting, and aesthetically pleasing landscape photographs. It's important to remember that these are just guidelines, and that you should feel free to experiment and try different compositions to see what works best for your particular scene. The most important thing is to have fun and be creative, and to keep practicing and learning to improve your skills as a landscape photographer.