Photographing the Lagoon Nebula With the DWARF Mini: 2 Hours 28 Minutes on M8
Photographing the Lagoon Nebula
With the DWARF Mini
Nine years after my first rough attempt at M8, I went back with a telescope small enough to hold in one hand. The difference was ridiculous.
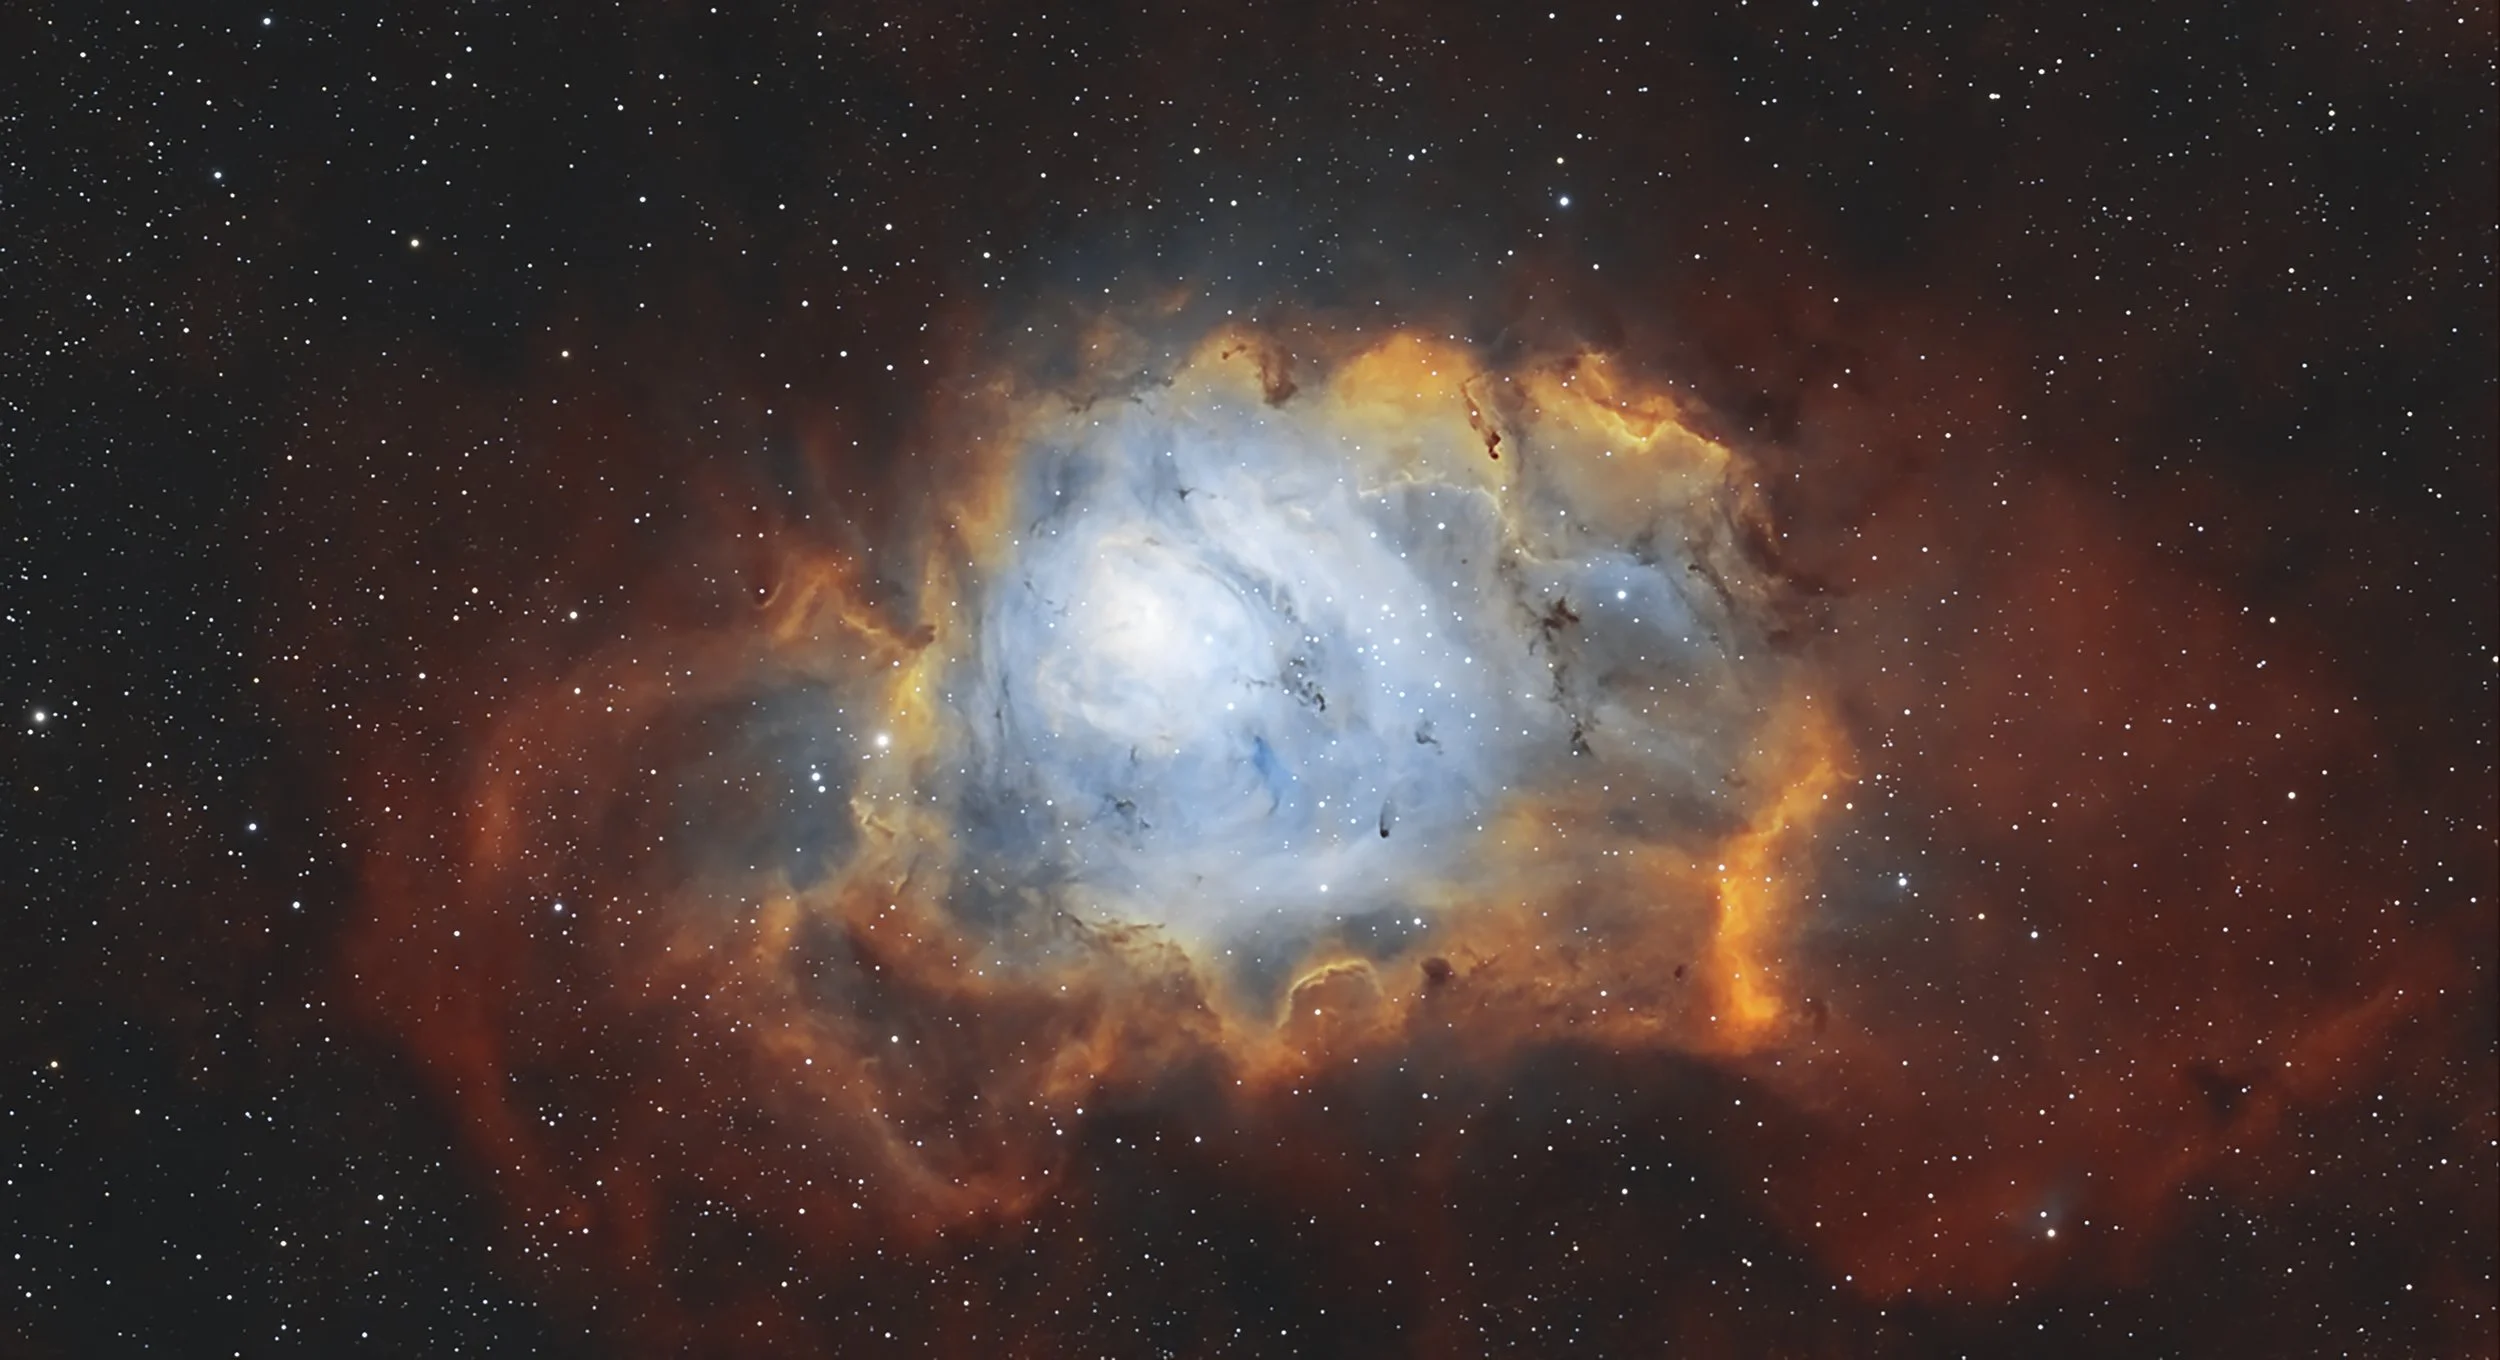
My first attempt at the Lagoon Nebula with the DWARF Mini was meant to be a quick first-light test. The clouds were closing in and I was still working out how the telescope operated.
Even that rushed session showed enough detail to make me go back three nights later and try again properly in EQ mode. By the end of the second night, I knew this was no longer just a quick product test.
It was not a one-click result. The telescope's automatic stack initially looked better than my manual attempt, I made a mess of combining the two nights, and I eventually went back to the raw files and rebuilt the clean dataset in PixInsight.
That is what makes this project worth documenting. The mistakes taught me as much as the final image did.
Why I started with the Lagoon Nebula
The Lagoon Nebula, also known as Messier 8, is a large star-forming region in Sagittarius. NASA places it around 5,200 light-years away, with young stars ionising the surrounding gas and causing the nebula to glow. Its bright emission, dark dust lanes and dense stellar field make it one of the most recognisable targets in the winter Milky Way. NASA has a useful overview of M8 here.

It was also unfinished business for me.
Years ago, I photographed the Lagoon and nearby Trifid Nebula using a Nikon D810, 70-200mm f/2.8 lens, 2x teleconverter and a Sky-Watcher Star Adventurer. The effective focal length was around 400 mm, which gave me a wide field containing both nebulae.
The result was not terrible, but M8 was small in the frame, the focus was soft and the stars overwhelmed the nebula. It showed that the target was there without revealing much of what made it interesting.
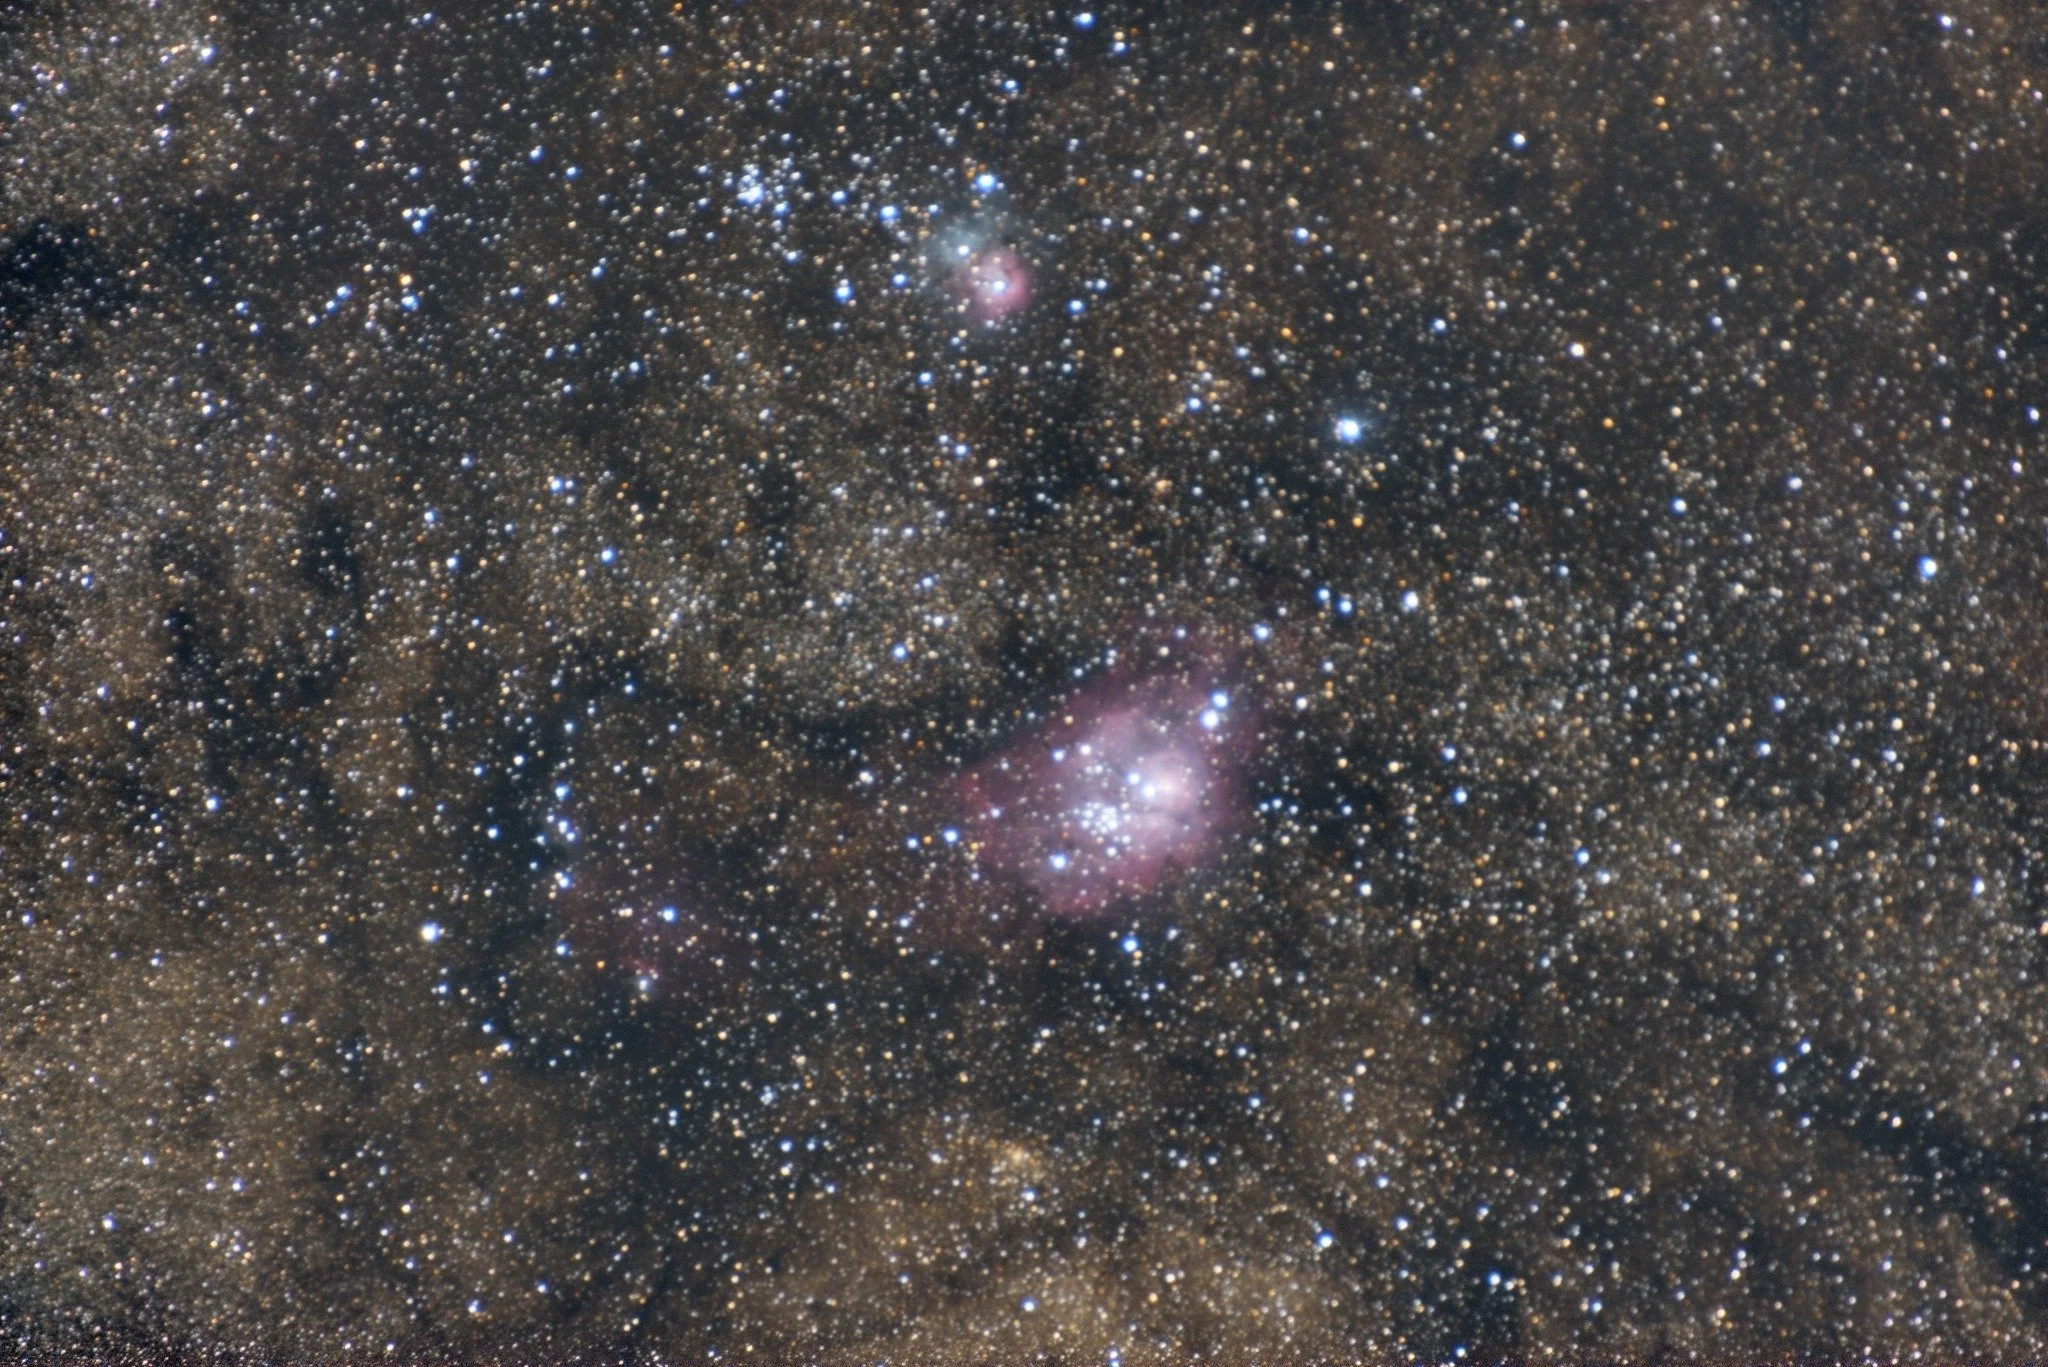
The comparison with the DWARF Mini is not scientific. Almost everything changed, including the optics, filter, tracking, software and my own processing experience. What it does show is how much easier the Mini made it to locate M8, frame it consistently and collect data that I could process properly.
The other reason was timing. From southeast Queensland, M8 sits beautifully high during winter, but by late August it is already moving west earlier each night. Waiting for perfect conditions could easily have meant waiting another year.
First light did not go to plan
The Mini arrived on 16 August, just after I returned from running a five-day photography workshop on the Gold Coast.
The forecast offered a short clearing before more cloud and rain. I charged the telescope, created the required account, updated the firmware, explored the Atlas and tried building a schedule containing the Lagoon and Trifid region.
By the time I worked through all of that, the usable window was disappearing.
I had intended to begin in equatorial mode, but I had not completed the alignment before dark. Rather than lose the night, I selected M8 and started capturing in Alt-Az mode using 30-second exposures, gain 60 and the built-in Duo-Band filter.
The session began before astronomical twilight had completely ended. At 6:48 pm, the app had already accepted 31 frames and the Lagoon was clearly visible. By 8:11 pm, increasing cloud had ended the night with 173 captured frames and 160 accepted.
That gave the onboard stack 80 minutes of usable integration.
It was not a deep dataset, but the bright central emission, surrounding hydrogen and dark dust lanes were already obvious. I was genuinely shocked by how much detail this little telescope had captured, especially for a fraction of the cost of my old camera setup.
It was the first time the telescope side of astrophotography had felt genuinely accessible to me.
Returning in EQ mode
I went back to M8 on 19 August from the same backyard, this time using EQ mode from the beginning.
| Telescope | DWARF Mini |
|---|---|
| Location | Bortle 4 Sunshine Coast backyard |
| Mount mode | EQ |
| Filter | Duo-Band |
| Exposure | 30 seconds |
| Gain | 60 |
| Binning | 1x1 |
| Raw frames | 328 |
| Rejected | 32 |
| Accepted | 296 |
| Total integration | 2 hours 28 minutes |
The finished image uses this EQ night only. I left the earlier Alt-Az frames out rather than padding the integration total with a less consistent dataset. The first night had already proved the telescope and filter could do the job.
My first manual stack was worse than the telescope's
I expected manually processing the raw files in PixInsight to produce a clear improvement over the stack generated by the DWARF Mini.
It did not.
My first attempt combined selected frames from the Alt-Az and EQ nights. I changed the weighting method, rejection method and minimum weight, added LocalNormalization and built a separate normalisation reference. The registered Alt-Az frames also carried large rotated border regions when aligned to the EQ reference.
I had changed so many variables at once that the result was impossible to diagnose cleanly. The combined master developed large magenta and green blotches. Removing LocalNormalization improved it slightly, but the background still fell apart when I pushed the data through GraXpert, BlurXTerminator, NoiseXTerminator and StarXTerminator.
Even my first manual stack of Night 2 alone looked mottled and overprocessed beside the DWARF-generated stack.
I had cooked it.
So I binned that branch and started again.
Rebuilding the data through WBPP
I went back to the complete Night 2 dataset and rebuilt it using PixInsight's Weighted Batch Preprocessing script.
The matched 30-second, gain-60 master dark and prepared Duo-Band flat were routed to the lights. I used PSF Signal Weight to inspect the sequence and rejected the frames where the signal and detected star count clearly collapsed. LocalNormalization and drizzle were both left off.
WBPP calibrated, registered and integrated the clean set, cropped the result and completed an astrometric solution.
This time the master held together.
I applied the same basic cleaning sequence to the WBPP master and the DWARF stack so I could compare them fairly. They were finally close. The DWARF stack looked slightly smoother and softer, while the WBPP result retained a little more texture and fine structure.
WBPP had not crushed the automatic stack. It had simply recovered from the mistakes in my first manual workflow. The telescope's own stack had been good all along.
Start with the controlled workflow, verify the result, then change one variable at a time.
Building the red, gold and blue palette
The final image is a false-colour H-alpha and O III interpretation rather than a natural-colour broadband image.
The Mini's Duo-Band filter isolates light around hydrogen-alpha and oxygen III while blocking much of the surrounding broadband glow from artificial light and moonlight. That makes emission nebulae practical from my backyard, but it also means the final colour has to be constructed from two dominant signals.
After correcting the gradient with GraXpert, I preserved the original RGB star layer from the corrected master. I then used DBXtract to separate Ha-dominant and OIII-dominant images.
Each channel was cleaned while still linear using BlurXTerminator, NoiseXTerminator and StarXTerminator. After stretching the starless Ha and OIII images to compatible levels, I used PixelMath twice. The first pass created a synthetic HO overlap image from the relationship between the two channels. The second built the Foraxx-style RGB image.
I also tested NarrowbandNormalization on a basic HOO version with the OIII boost set to 1.20, but I rolled it back. It bleached the core and lifted cyan noise, so it was not part of the finished workflow.
That gave me the colour separation I was chasing:
- deep red through the faint outer hydrogen emission
- copper and gold through stronger Ha structure
- violet where Ha and OIII overlap
- icy blue through the OIII-dominant core
Several small Curves passes revealed the separation without crushing the background or turning the core fluorescent. I returned the saved RGB stars using Screen blending at roughly 70% strength, then finished it lightly in Photoshop.
There is no independent sulfur II data in this image. The gold is an artistic mapping created from the captured Ha and OIII relationship, so this should not be confused with a true SHO image.
What the final data actually produced
The finished image pulled out far more of the Lagoon than I expected from a 30 mm telescope and a 2-megapixel sensor.
The bright central region has clear structure, dark dust cuts through the emission and the broader hydrogen shell extends well beyond the core. The cooler OIII region gave me enough separation to build the blue centre I wanted without simply painting colour into the image.
It also shows the limits.
The faint outer emission remains much weaker than the centre. The native resolution limits aggressive cropping, and the Duo-Band data does not contain the natural continuum colour or surrounding dust that a deep broadband dataset could provide.
I am not claiming the Mini replaces a larger telescope or cooled astronomy camera. What it did was remove enough friction for me to collect useful data from home, then take full creative control of it in PixInsight.
That is exactly what I had been missing.
What I would do differently
If I repeated the project now, I would:
- Complete EQ alignment before any target-specific calibration or tracking.
- Use WBPP as the first raw-processing route rather than rebuilding everything manually.
- Keep the first clean single-night master before experimenting with multi-night combinations.
- Use LocalNormalization only after proving there is a problem it needs to solve.
- Change one processing variable at a time and compare it with a written control.
I would also record every capture session more carefully. The technical details felt excessive while I was learning, but they became invaluable when I needed to understand why one stack worked and another fell apart.
Finished for now, not forever
I am calling this version finished, but I am not done with M8.
When the target returns to a useful position, I want to use both Minis together in EQ mode to build a much deeper and more homogeneous dataset. The best moonless nights will be reserved for broadband so I can collect more natural star colour, continuum colour and surrounding dust. Narrowband can be gathered later under brighter Moon conditions.
The eventual goal is a broadband image strong enough to stand on its own, with the Ha-rich Duo-Band data blended back into the emission regions carefully rather than dominating the entire frame.
For now, this is the image that made it real. Deep-sky astrophotography was no longer something I planned to do one day. I was actually doing it.
That story began in Why I Returned to Deep-Sky Astrophotography in 2026. I will keep adding each finished target to the Deep-Sky Projects page.