Why I Bought a Second DWARF Mini After One Night
Why I Bought a Second
DWARF Mini After One Night
The first successful M8 dataset changed how I thought about clear nights, integration time and what a compact smart telescope could become.
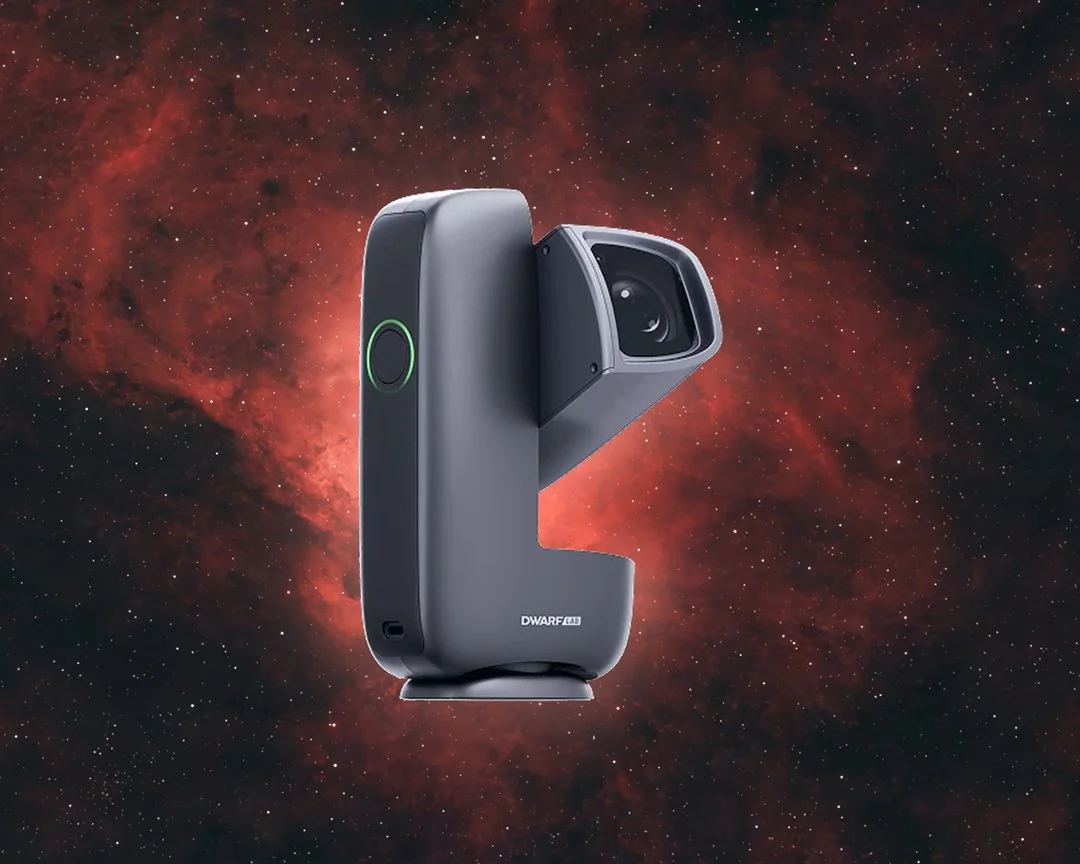
DWARFLAB sent me a DWARF Mini on a six-month loan so I could test it properly. I set it up in my Bortle 4 backyard, pointed it at the Lagoon Nebula and watched the first frames appear on my phone.
The next day, I spent A$704 of my own money on a second one.
That was not the plan. I had only just returned to deep-sky astrophotography after years of shooting the night sky with normal camera gear, and one loan telescope should have been more than enough to get started. Then I saw how much detail this tiny telescope had captured in a single night. I was honestly shocked. It cost a fraction of my old Nikon D810, 400mm lens and tracking setup, yet it had produced data I could take into PixInsight and process properly.
I did not buy the second Mini because the first one was lacking. I bought it because the first night showed me what two of them could make possible.
This is not my long-term review of the DWARF Mini. I have only been using it for a matter of weeks, and there are still things I want to test across different targets, conditions and Queensland summer temperatures. This is the simpler story of why I bought a second one so quickly, how I am using the pair and where I have already found their limits.
The Mini lowered the effort required to collect usable deep-sky data. A second Mini lets me collect twice as much telescope integration during the same clear window.
The first night changed the calculation
I have been photographing the night sky since around 2017. Most of that time was spent on wide-field landscape astrophotography, although I had also dabbled in deep-sky work with a Nikon D810, a 400mm lens and a Sky-Watcher Star Adventurer.
That setup could reach some of the larger deep-sky objects, but it was still a camera-and-lens system being pushed into a job it was not really designed to make easy. Framing, polar alignment, tracking, focusing and processing all required time, extra equipment and a clear night away from the usual interruptions of life.
The DWARF Mini changed the amount of friction involved. The telescope is small enough to carry outside in one hand. It handles GoTo, tracking and scheduled capture through the app, includes a Duo-Band filter for emission nebulae and saves raw FITS files for proper desktop processing. Once a sequence is running, I can go back inside and let it continue without keeping the phone connected all night.
That last point matters more than it sounds. The best telescope is not automatically the one with the largest aperture or the longest specification list. It is the one you can put outside and actually use when a clear window appears.
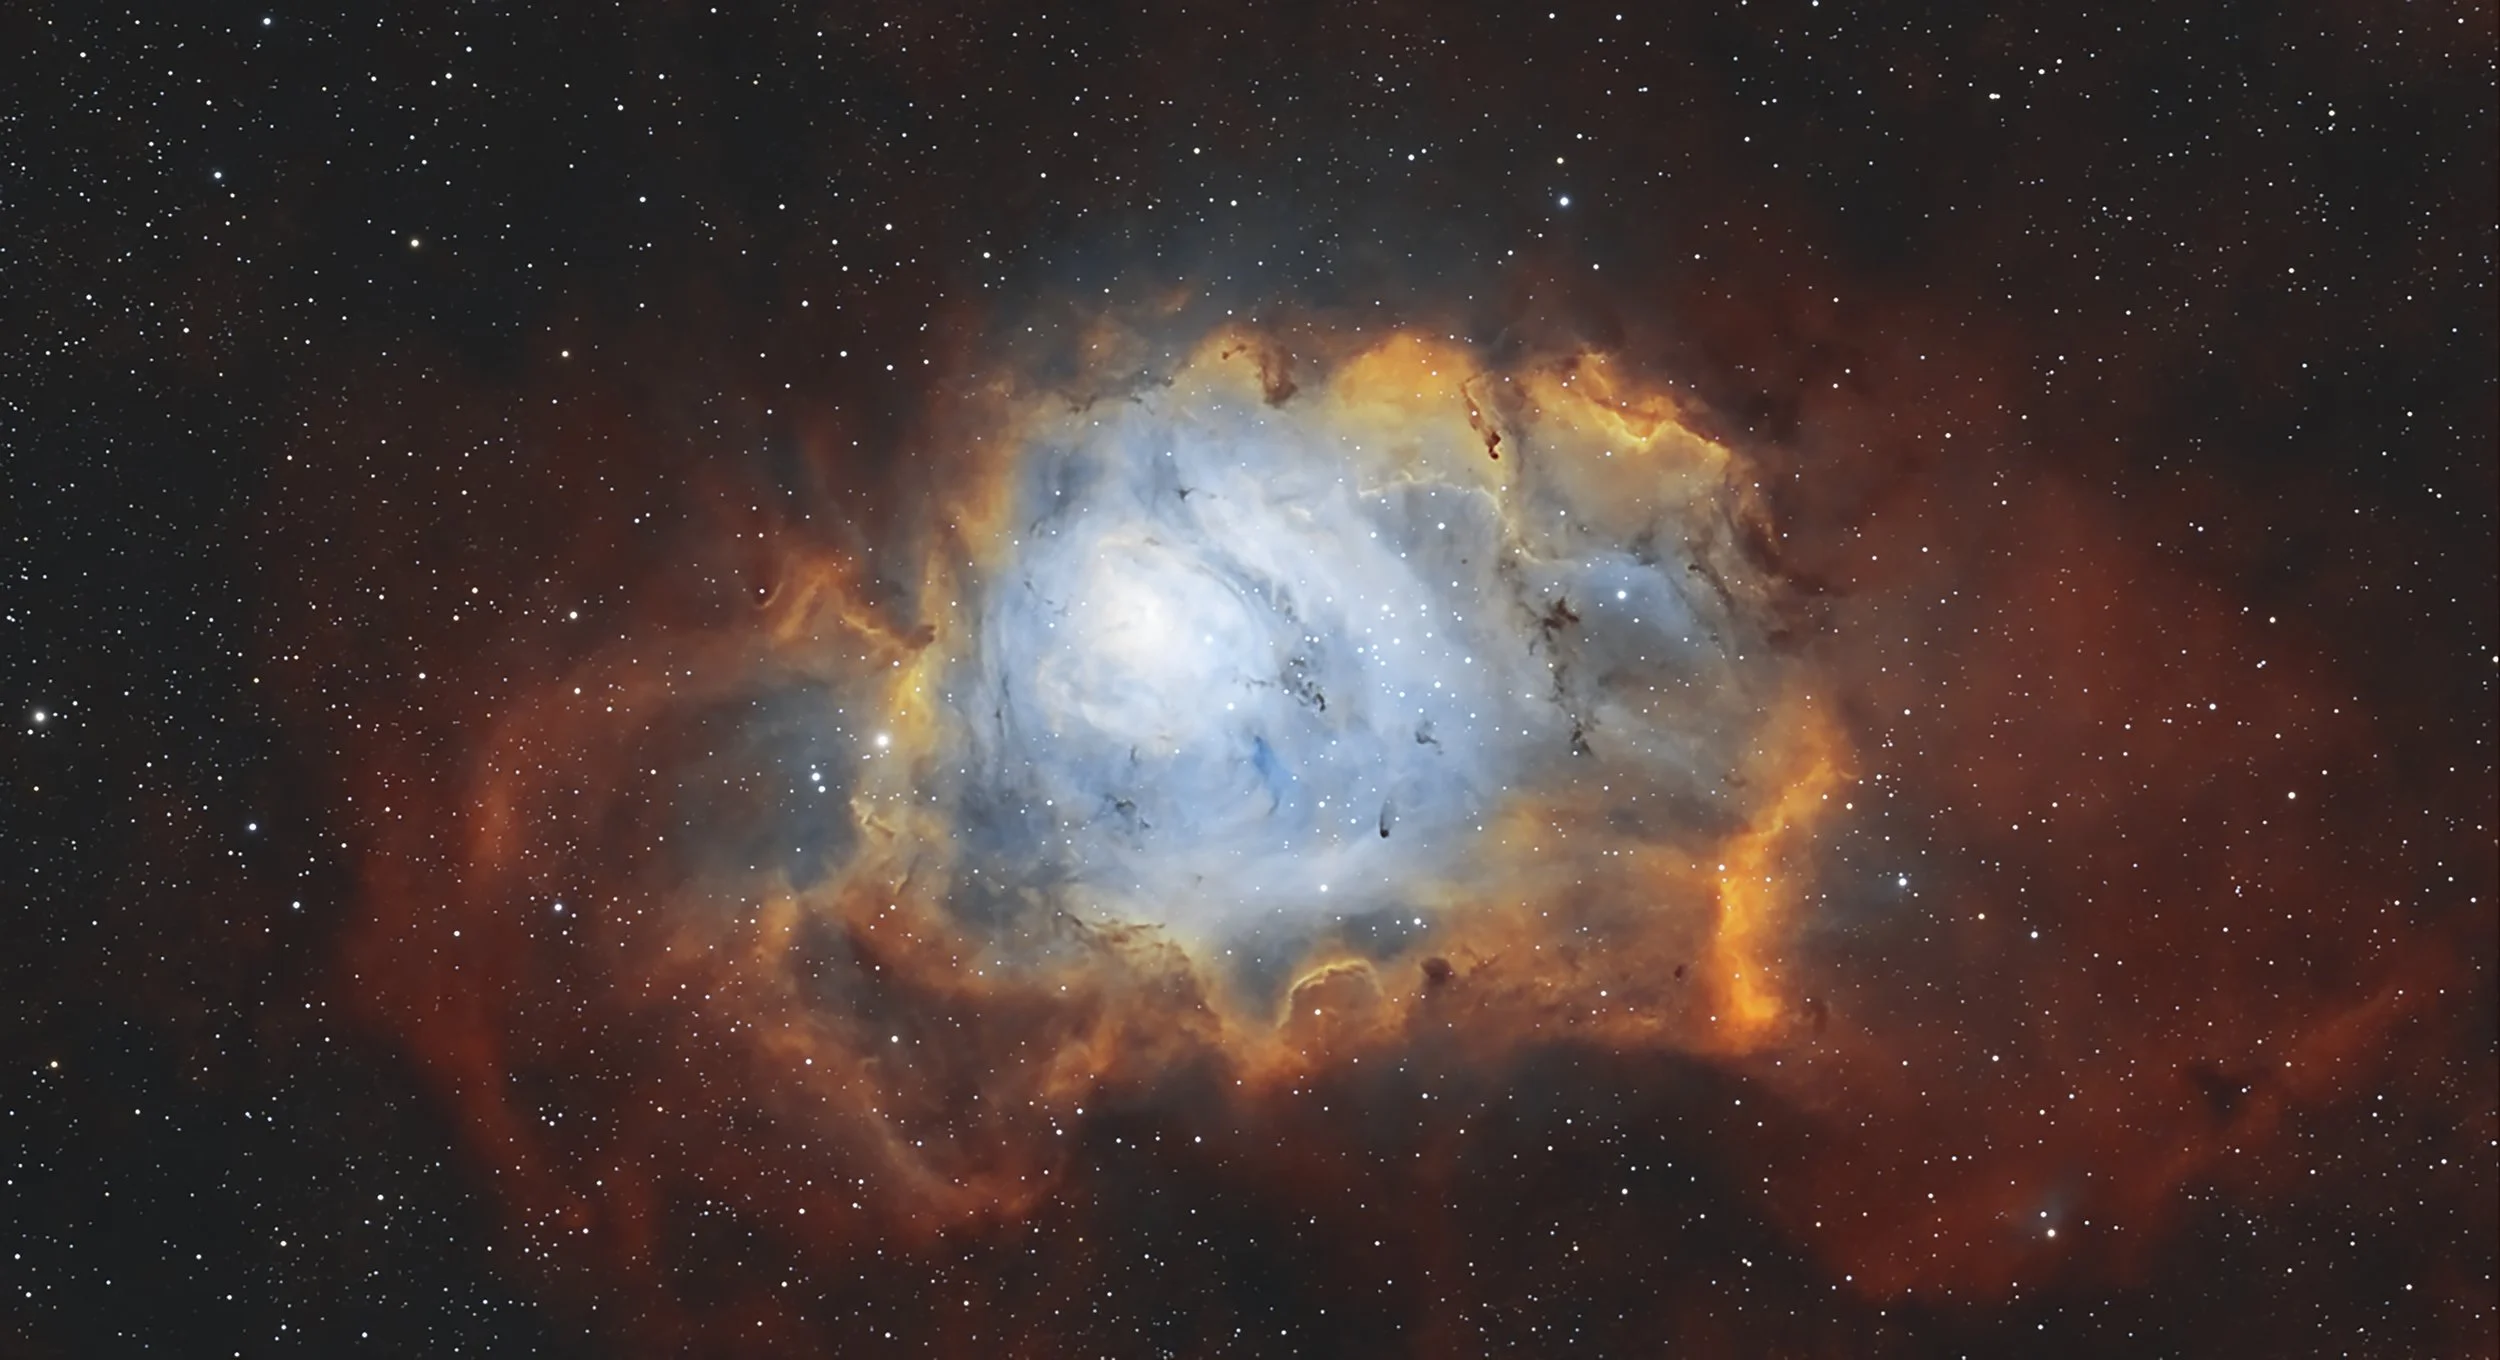
My first finished result was the Lagoon Nebula, Messier 8. The final image used 296 accepted 30-second exposures for 2 hours 28 minutes of integration through the Duo-Band filter. It was captured in EQ mode from my Bortle 4 Sunshine Coast backyard and rebuilt from the raw files in PixInsight.
The result was enough to convince me that this was not a novelty that would be used twice and left in a cupboard. I could collect real data from home, work on it with the same intent I bring to my normal photography and keep improving the result after the telescope had finished for the night.
If you want the full story behind that first image, I have broken it down in Photographing the Lagoon Nebula With the DWARF Mini. The broader story of how the Mini pulled me back into this side of astrophotography is in Why I Returned to Deep-Sky Astrophotography in 2026.
I was not buying a backup. I was buying time.
Clear nights are limited, and they become even more valuable when a target is only in a good position for part of the year. Here on the Sunshine Coast, cloud, humidity, Moon phase and the target's position can turn an apparently good week into one usable night.
One telescope gives me one stream of data during that window. Two Minis give me several options.
| Two-rig setup | What it lets me do |
|---|---|
| Duo-Band plus Duo-Band | Collect twice as much total telescope integration on the same target during the same real-world capture time |
| Astro plus Astro | Build broadband integration faster on moonless nights |
| Duo-Band plus Astro | Capture emission data and more natural star colour at the same time |
| Separate targets | Use a short clear window without abandoning one project for another |
| Separate mosaic panels | Cover more sky during the same night, provided the panels retain enough overlap |
Two Minis do not magically double image quality. When both are aimed at the same target, they double the amount of exposure collected per hour. Signal-to-noise still follows the normal square-root relationship, but I can reach a given total integration in roughly half the wall-clock time.
That is useful for a two-hour project. It becomes far more useful when an image needs 10, 15 or 20 hours and the season is already moving on.
I label the telescopes Mini A and Mini B, then give each one its own capture plan. If they are working on the same target, I can synchronise their schedules to start within about a second of each other. They do not need to communicate with one another. Each telescope simply runs its own sequence, and I combine the data later.
What two Minis have already allowed me to do
Within the first few weeks, I had used the Minis on nearly ten targets. Not all of those projects are finished, and some need more data before I am happy to publish them, but that volume would have been unrealistic for me with a larger traditional rig that took longer to deploy and manage.
The most ambitious test so far has been NGC 6188, the Fighting Dragons of Ara. That grew into a five-panel, multi-night mosaic captured with both Minis. Across the project, I loaded 1,370 one-minute exposures and accepted 1,334 of them, giving me 22 hours 14 minutes of total telescope integration.
That does not mean I spent more than 22 real hours standing outside. The two-rig setup allowed the project to accumulate telescope-hours in parallel while I was inside. It is exactly the type of job I had in mind when I ordered the second unit.
It also exposed the most important mosaic question I have found so far. I used the maximum 1.8 × 1.8 field, which prioritised total coverage and left little tolerance for drift, registration and edge cropping. The project did not produce a polished result without substantial intervention, but that problem has now given me a controlled test worth running.
What makes the Mini work for me
The Mini is not the most powerful telescope, and it is not trying to replace a large cooled astronomy camera on a serious equatorial mount. Its strength is that it removes enough setup friction to make deep-sky capture practical on an ordinary night.
It is genuinely quick to deploy
I can carry it into the backyard, level it, connect through the app and start planning a target without assembling a camera, lens, tracker, intervalometer, guide system and power arrangement. EQ mode takes more setup than placing it in Alt-Az mode, but it is still compact and manageable.
That ease of deployment changes how often I use it. A two-hour clear break can become useful data instead of a night I decide is not worth setting up for.
The built-in filters make backyard capture practical
The Duo-Band filter has been one of the main reasons the Mini has worked so well for me. It isolates the hydrogen-alpha and oxygen-III regions used by emission nebulae, which helps cut through both suburban light pollution and moonlight.
It does not make conditions irrelevant, and it cannot turn a bright Moon into a dark sky. It does mean I can keep gathering useful narrowband data on nights when I would normally avoid wide-field Milky Way photography entirely. I can then switch to the Astro filter for broadband data when the Moon is out of the way.
It gives me the raw data
The phone stack is useful for checking that a target is working, but it is not the end of the process for me. The Mini saves the individual FITS files, which means I can calibrate, register, reject, integrate and process them in PixInsight or another desktop program.
That is the difference between a device that shows me an object and a camera system I can build a finished image around. The Mini makes capture accessible without forcing me to accept its automatic result as the final photograph.
It keeps shooting without the phone
The app is needed to configure the telescope, frame the target and start or schedule the session. Once the capture has started, the Mini continues even if I close the app, walk inside or lose the live connection.
That behaviour is the saving grace of the wireless system. I can usually stay connected from inside at around 10 metres, although walls, the phone and the local Wi-Fi environment all affect it. Connecting the Mini through the home network in STA mode can improve the experience when the router coverage is good. Even if the live view drops out, the actual capture does not stop.
The limitations I have found so far
Buying a second Mini after one night does not mean I think the telescope is flawless. Some compromises are expected at this size and price, and one has created a real problem in my work.
The 1080p files leave limited room to crop
The Mini's telephoto camera uses a Sony IMX662 sensor and records 1920 by 1080 images, which is about two megapixels. The 150mm focal length works well for larger nebulae, but small galaxies, planetary nebulae and compact targets remain small in the frame.
I would love a higher-resolution output with more room to crop. It is worth separating that from physical sensor size. A larger sensor would primarily give a wider field of view at the same focal length. More pixels, greater focal length or both would provide the extra sampling and crop latitude I am missing.
For web display and many large targets, the current files can still produce a surprising amount of detail. They are less forgiving if the composition needs a heavy crop or the target occupies only a small part of the frame.
Default framing is not always the best composition
The catalogue can find a target quickly, but its default coordinates do not always place the object where I want it aesthetically. A target may be technically centred while its surrounding structure feels cramped or unbalanced.
The Preview Frame tool lets me adjust the composition before capture. If I move away from the catalogue coordinates, I can save the revised position as a custom target for later sessions. That extra step is worth doing before a multi-night project. Returning to slightly different framing can waste edges and reduce the useful common area once the data is registered.
The connection can drop, but capture continues
Direct phone connection is convenient while standing beside the telescope, but it can become less reliable through walls or at greater distance. My normal indoor range is about 10 metres. Home Wi-Fi mode can be better when the router reaches the backyard, although results will depend on the network.
I do not consider this a deal-breaker because the telescope completes an active capture or synchronised schedule without the phone staying connected. It is still something a new owner should understand. Losing the live app view is not the same as losing the imaging session.
Maximum mosaic coverage left too little margin
This is the limitation I take most seriously, although the cause is now more specific than I first thought and still needs controlled testing.
My first automated mosaic of NGC 6188 used the maximum 1.8 × 1.8 field. That setting prioritises total sky coverage and appears to leave only about 20 per cent nominal overlap between adjacent panels. Even the first clear night showed a visible boundary in the DWARF autostitch. Frame drift, registration and edge cropping then reduced the useful common area further, while cloud-affected nights introduced uneven integration, brightness and noise between panels.
Software can blend panels, but it cannot create signal where the overlap has too little exposure. I eventually captured an additional central bridge panel, adding 427 accepted one-minute exposures and 7 hours 7 minutes of integration where the mosaic needed it most. I then rebuilt the project in Astro Pixel Processor.
This does not prove the Mini's automated mosaic mode is fundamentally unreliable. It shows that maximum coverage was too aggressive for this polished multi-night project. My next controlled test will compare 1.2, 1.4, 1.6 and 1.8 mosaic fields using the same target, settings and integration time. The working expectation is that 1.4 to 1.6 will retain enough overlap for a cleaner external stitch, but that remains a hypothesis until the registered data confirms it.
For serious mosaics in the meantime, I would avoid the maximum 1.8 setting, keep the orientation and capture settings consistent, and track accepted integration for every panel. I am preparing a separate guide and field test covering the full two-Mini project, the different field sizes, measured overlap, bridge data and the final APP build.
Queensland summer is still an unanswered question
The Mini's sensor is uncooled. I have captured useful data in the temperatures I have encountered so far, but I have not yet tested it through a Sunshine Coast summer. Higher ambient temperatures can increase thermal noise, so this is something I want to measure rather than guess about.
That is one reason I am calling this an early field report instead of a complete review.
Who I think the DWARF Mini suits
The Mini makes the most sense for someone who wants to start collecting deep-sky data without beginning with a mount, telescope, camera, guide system, power system and laptop. It also makes sense for an experienced photographer who wants a compact second rig or a low-effort way to keep working from a suburban backyard.
It is particularly well suited to larger nebulae, star fields and targets that fit comfortably within its 150mm field of view. The built-in filters, scheduling and raw FITS output give it far more room to grow than the simple phone-controlled exterior suggests.
It is less suited to someone whose priority is small galaxies, high-resolution planetary work, heavy cropping or the cleanest possible data from a cooled sensor. Those jobs ask for more focal length, more pixels or more specialised equipment.
The important part is matching the telescope to the work. The Mini has made deep-sky astrophotography easier for me to do, but it has not removed the need to plan a target, collect enough integration or learn how to process the data.
Why I am watching the DWARFLAB Draco
DWARFLAB has announced the Draco with a 90mm aperture and an expected 2026 arrival. I have already registered for priority access because I am interested in what a larger system could add to the type of work I am now doing.
I would love to see higher-resolution capture, more crop latitude and greater reach, but those details should not be treated as confirmed until DWARFLAB publishes the final specification. The reason Draco interests me is not that the Mini has suddenly become obsolete. It is that the Mini has shown me how useful this all-in-one approach can be, and I want to see how far the larger platform takes it.
Even if Draco becomes my main telescope for smaller targets, two Minis would still have a place as compact wide-field rigs, parallel data collectors and portable systems I can deploy quickly.
So, was buying the second one ridiculous?
It probably looked that way from the outside. I had used the loan unit for one successful night and ordered another before the first project was even fully processed.
But I did not make the decision from a product page. I made it after looking at my own data from my own backyard and realising that I finally had a deep-sky system I wanted to use every clear night.
The second Mini has already helped me collect more data, test more targets and attempt a mosaic that would have taken far longer with one rig. It has also helped me find the system's limitations much faster.
That is exactly what I bought it for.